

Last Updated: October 29, 2026
Quick Summary
To tension polymer spokes, first confirm the wheel is truly out of true and not damaged, then balance even tension across all spokes and tighten in quarter-turn steps. Measure each spoke, stay under the lower of the spoke and rim maximum, and recheck after each change.
- Balance tension evenly on the drive side and non-drive side before chasing one specific number.
- Stay under the published maximum; Berd spokes are listed with a 100 kgf ceiling.
- Adjust in quarter turns and re-measure, because polymer spokes respond quickly to small changes.
- Diagnose broken spokes or cracked rims first, since tensioning cannot fix them.
- Use a meter calibrated for polymer; a steel setting can give misleading readings.
Table of Contents
- What Spoke Tension Means and Why It Matters for Polymer Wheels
- Diagnose Before You Tighten: Checking Why the Wheel Is Out of True
- Choosing a Spoke Tension Meter for Bicycle Wheels
- Berd Spoke Tension: Limits, Calibration and Converting Readings
- Step-by-Step: How to Tighten Mountain Bike Spokes Without Overloading Polymer
- Settling, Verifying and Common Mistakes on Mountain Bike Wheels
- Booking a Professional Wheel Check or Custom Build From STOXbyHand
- Frequently Asked Questions
What Spoke Tension Means and Why It Matters for Polymer Wheels
Spoke tension is the pull each spoke exerts on the rim when the wheel is built, and it is what keeps a wheel round, true and strong.
Even tension spreads load across the whole wheel.
Here is what matters most when you tension polymer spokes:
- Balance first. Even tension on the drive side and non-drive side matters more than hitting one number.
- Stay under the limit. Each spoke brand publishes a maximum tension. Berd spokes, for example, are listed with a 100 kgf ceiling in the STOXbyHand asymmetric gravel wheelset notes.
- Go slowly. Polymer does not stretch the way steel does, so small changes add up fast.
A rim-specific note matters here. A symmetric rim on a rear disc wheel can produce a difference of up to 40% between drive-side and non-drive-side tension, because the bracing angles are different.
Diagnose Before You Tighten: Checking Why the Wheel Is Out of True
Most wheels that need tensioning are not simply loose. Before you touch a nipple, find out what is actually wrong. Tightening a wheel with an unknown cause often makes the problem worse.
Start by spinning the wheel in a truing stand or on the frame and watching the rim:
- Lateral wobble (side to side): Usually uneven tension between the two sides of the wheel.
- Radial hop (up and down): Often a flat spot, a damaged rim, or a loose spoke.
- Rim off-centre: Check that the rim sits centred between the hub flanges.
Also check for broken or loose spokes, cracks around the spoke holes, and any sign that the rim has taken an impact.
Watch out: Do not keep tightening a wheel that keeps going out of true.
Choosing a Spoke Tension Meter for Bicycle Wheels
A spoke tension meter gives you a number instead of a guess, but on polymer spokes the wrong meter or the wrong setting will give you a confident wrong answer. Most meters measure how much a spoke deflects under a known load and then convert that deflection into tension using a chart built for a specific spoke material and diameter.
What to check before you buy or borrow a meter
- Material support. Confirm the meter manufacturer publishes a conversion chart or setting for your exact polymer spoke brand and model. If the chart only lists steel gauges, the meter is not calibrated for polymer and you should not trust absolute readings.
- Spoke diameter fit. Polymer spokes are often thicker or shaped differently from steel. Check the meter's jaw or hook fits your spoke without pinching or slipping.
- Conversion chart currency. Charts are updated as spoke models change. Use the version that matches your spoke's current specification, not an older PDF saved on a forum.
Calibrating for polymer spokes
Calibration is where most riders go wrong. A meter set up for steel will read polymer spokes inaccurately, so check that you are using the polymer setting or a conversion chart made for your spoke brand. If the manufacturer does not publish a polymer chart, do not guess an absolute tension from a steel reading. Instead, use the meter as a comparison tool: measure every spoke on the same side, record the readings, and use the spread to identify high and low spokes.
Verifying readings against manufacturer guidance
A meter reading is only useful if it agrees with the spoke maker's published limits. Cross-check your target tension against the maximum tension the spoke manufacturer lists for your model, and against the rim manufacturer's maximum spoke tension. The lower of the two is your ceiling. If your meter reading suggests you are near that ceiling but the wheel still feels soft, stop and check the meter calibration rather than adding more tension.
Meter types and trade-offs
- Deflection meters with interchangeable jaws. More versatile across spoke materials, but you must use the correct jaw and chart for each spoke type.
- Pluck-based or acoustic methods. Useful as a quick sanity check, but not a substitute for a calibrated meter on polymer spokes because the relationship between pitch and tension changes with material and spoke length.
- Dedicated polymer-spoke gauges. Less common, but the most reliable when available because the chart is built for the material from the start.
Do not treat meter readings as absolute. Use them to compare spokes on the same wheel, keep the left and right sides balanced, and verify against the spoke and rim manufacturer's published limits before you ride.
Berd Spoke Tension: Limits, Calibration and Converting Readings
Berd spokes are made from Dyneema, a high-strength polyethylene fibre, and they behave differently from steel. The most important number is the maximum tension. The STOXbyHand asymmetric 46 gravel wheelset notes state a maximum of 100 kgf for Berd spokes, compared with roughly 120 kgf for steel.
Calibration is where many riders go wrong. A meter set up for steel will read Berd spokes inaccurately, so check that you are using the polymer setting or a conversion chart made for Berd.
Two practical tips help here:
- Measure every spoke on the same side before you adjust anything, so you have a baseline.
- Record your readings so you can see which spokes move the most.
Step-by-Step: How to Tighten Mountain Bike Spokes Without Overloading Polymer
Mountain bike wheels add two complications that road wheels often do not: rear-wheel dish and asymmetric tension between the drive and non-drive sides. On a rear wheel, the cassette pushes the hub flanges off-centre, so the drive-side spokes sit at a steeper bracing angle and carry more tension for the same lateral stiffness. A symmetric rim on a rear disc wheel can produce a difference of up to 40% between drive-side and non-drive-side tension.
MTB XC / AM 29er 30/36 Asymetical →
Preparing the wheel and tools
Set up the wheel in a truing stand, or secure it so it spins freely. Have these ready:
- A spoke wrench that fits your nipples without rounding them
- A tension meter set for your spoke material, with the correct conversion chart
- A small amount of thread lubricant for the nipple threads
Check the bearings are smooth and the tyre is seated properly before you start. Confirm the spoke and rim manufacturer's maximum tension figures and note the lower of the two as your ceiling.
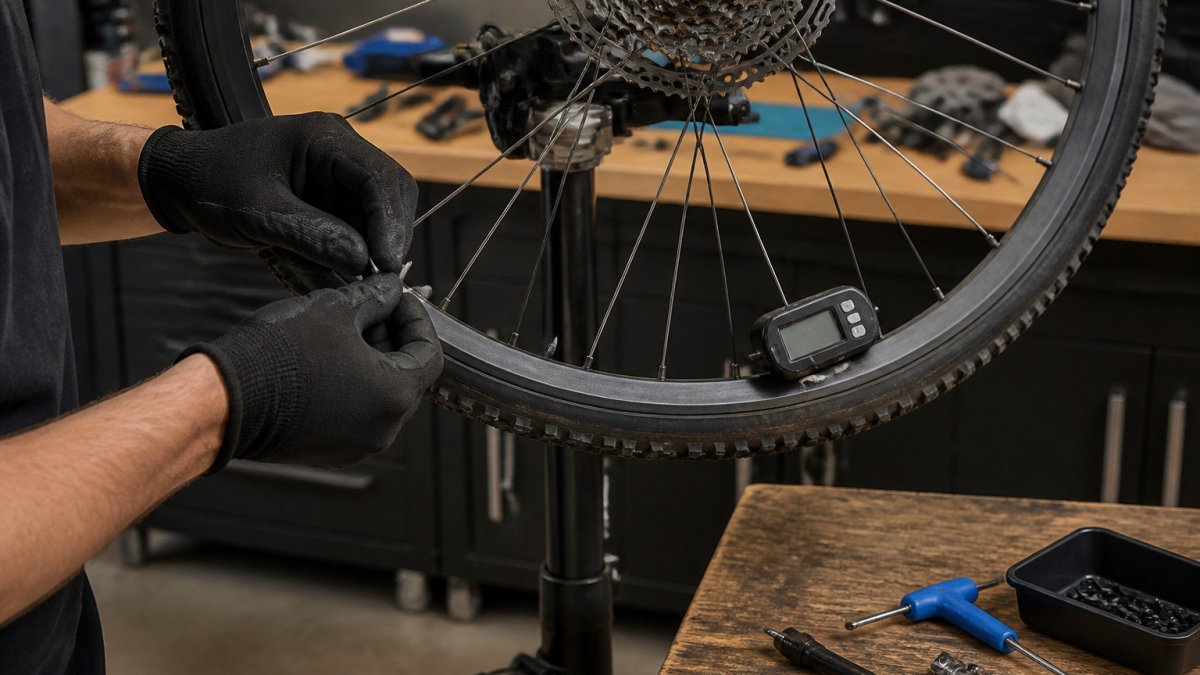
Handling polymer spokes and nipples
Polymer spokes do not behave like steel at the nipple. They can twist, abrade, or creep if you turn the nipple without holding the spoke steady. Hold the spoke where you can, or use a spoke holder, and turn only the nipple. Keep the wrench square on the nipple flats so you do not round them. If a nipple feels tight or gritty, stop and add a drop of thread lubricant rather than forcing it.
Adjusting in quarter-turn increments
Work in small steps. Turn each nipple a quarter turn at a time, then measure again. Polymer spokes respond to small changes, so large turns can overload one spoke and throw the wheel out of balance.
- Measure all spokes on one side and note the readings.
- Find the lowest spokes and tighten each by a quarter turn.
- Re-measure, then repeat until the side reads evenly.
- Move to the other side and balance it against the first, respecting the dish difference between drive and non-drive sides.
- Keep every spoke below the lower of the spoke and rim manufacturer's maximum.
Turn the nipple only as far as needed, and never let the spoke twist with it. If a spoke will not come up to tension with small turns, stop and diagnose rather than adding more turns.
Checking dish and lateral true as you go
After each round of adjustments, spin the wheel and check lateral true. Then check dish: the rim should sit centred between the hub flanges, not centred in the frame. On a rear mountain bike wheel, the drive side usually runs higher tension than the non-drive side, and that is normal. If the dish is wrong, correct it before you continue tensioning, because a wheel that is out of dish will never balance properly.
Correcting lateral wobble without overloading
When you find a lateral wobble, tighten the spokes on the opposite side of the wobble by a quarter turn and loosen the spokes on the same side by a quarter turn. Work in pairs so you do not add net tension to the wheel. Re-measure after each pair and keep every spoke under the ceiling. If the wobble returns after a few pairs, stop and check for a bent rim, a damaged spoke, or a loose nipple before continuing.
Settling and re-checking
Polymer spokes and the nipples seat into the rim over the first few rides, so tension will drop slightly. Spin the wheel, re-check the truing and tension, then ride and re-check again after a few hours. A quick verification check after every session: spin the wheel, look for side-to-side wobble, and confirm no spoke feels noticeably looser or tighter than its neighbours.
The table below summarises the key checks and limits to keep in mind while tightening polymer spokes on a mountain bike wheel.
| Item | Value | Note |
|---|---|---|
| Adjustment increment | Quarter turn | Measure again after each change |
| Berd maximum tension | 100 kgf | Compared with roughly 120 kgf for steel |
| Drive vs non-drive difference | Up to 40% | On symmetric rim on rear disc wheel |
| Measure before adjusting | All spokes on one side | Record readings to find high and low spokes |
| Tension ceiling | Lower of spoke and rim maximum | Check both manufacturer figures |
Settling, Verifying and Common Mistakes on Mountain Bike Wheels
After tensioning, the wheel needs to settle. Polymer spokes and the nipples seat into the rim over the first few rides, so tension will drop slightly. Spin the wheel, re-check the truing and tension, then ride and re-check again after a few hours.
Watch for these common mistakes:
- Tightening too far at once. This is the most common cause of overloaded spokes and cracked rims.
- Ignoring the wheel's dish. Dish, the centring of the rim between the hub flanges, affects how evenly the two sides carry load.
- Trusting the number on the meter alone. A reading from a steel calibration on a polymer spoke can be misleading.
A quick verification check after every session: spin the wheel, look for side-to-side wobble, and confirm no spoke feels noticeably looser or tighter than its neighbours.
Booking a Professional Wheel Check or Custom Build From STOXbyHand
STOXbyHand hand-builds carbon fiber wheelsets for road, gravel and mountain bikes, with spoke options including Berd and TiFi polymer. See the TiFi Polymer Spoked Gravel Max or the Berd spoked asymmetric gravel wheelset.


Frequently Asked Questions
What tension should mountain bike spokes be?
The Berd spoked asymmetric gravel wheelset listing specifies a maximum system weight of 110kg.
How do you tighten mountain bike spokes?
Adjust the spoke nipple with a spoke wrench in small increments, usually a quarter turn at a time. Work across the wheel so you do not overload one side, and check lateral and radial true after each set of adjustments. Re-measure tension with a tension meter that is suitable for your spoke type, and stop before any spoke reaches the manufacturer's maximum. Polymer spokes should be handled gently, and the nipple should be turned slowly to avoid stressing the spoke.
How do you know if spokes are tight enough?
Spokes are tight enough when readings are within the specified range, the tension is even across the wheel, and the rim runs true without wobble after the wheel has been ridden or stress-relieved. Squeeze pairs of adjacent spokes: they should feel similar in tension. A loose spoke that ticks or rattles is a sign it needs tightening, but avoid guessing; confirm with a meter where possible.
Can polymer mountain bike spokes be tensioned like steel spokes?
Not exactly. Polymer spokes such as Berd have lower maximum tension limits than steel, and they should never be tightened by feel alone. Follow the manufacturer's tension specification, use a tension meter suited to your spoke type, and make small adjustments. Because wheel dish and the asymmetric rim profile affect how tension is shared between the drive and non-drive sides, check both sides rather than assuming the figures are the same.
