

Table of Contents
- Why Carbon Wheelset Maintenance Differs From Alloy
- Best Cleaning Products for Carbon Cycling Components
- The Carbon Wheel Inspection Checklist for Structural Safety
- Carbon Spoke Tension Maintenance and Truing Guide
- Brake Track Care and Heat Management
- Hub, Bearing, and Tubeless System Service Intervals
- Storage, Transport, and Knowing When to Call a Pro
- Conclusion: Build a Maintenance Schedule That Sticks
- Frequently Asked Questions
Last Updated: September 8, 2026
Carbon fibre wheelset maintenance is about protecting a significant investment and ensuring your safety at speed. A carbon rim that fails under braking load or from an undetected structural crack can end a ride catastrophically. At STOXbyHand, with over 12 years of experience hand-building carbon wheelsets, we understand the importance of regular care.

A proper maintenance routine takes less than an hour a month, combining a careful wash with mechanical inspections of the spoke system and brake surfaces.
Why Carbon Wheelset Maintenance Differs From Alloy
Carbon fibre does not corrode like aluminium, but it demands different care because the composite is vulnerable to impacts and heat in ways alloy is not. While alloy rims can tolerate curb rash and continue functioning, a carbon rim with a deep gouge or hairline crack has compromised structural integrity and may fail suddenly.
Unlike alloy, which dents, carbon cracks or delaminates. Delamination, where the layers of resin and carbon separate, is often invisible to the naked eye until it is catastrophic. This is why a carbon wheel inspection checklist is critical, not optional.
Best Cleaning Products for Carbon Cycling Components
The best cleaning products for carbon cycling components are mild, pH-neutral soaps and dedicated bike-specific degreasers. A simple mix of warm water and a mild detergent, such as dish soap, is effective for removing road grime and brake dust without damaging the clear coat.
For the drivetrain and brake track, use a dedicated degreaser to cut through chain lube and rubber residue. When washing, use a soft sponge or a microfiber cloth specifically reserved for your wheels. Avoid brushes with stiff bristles that can scratch the clear coat.
What Not to Use on Carbon Rims
Never use acetone, paint thinner, or any citrus-based degreaser on the carbon surface itself. These aggressive chemicals can soften the resin and permanently cloud or damage the clear coat. Similarly, avoid pressure washers aimed directly at the hub bearings or the rim bed.
The Carbon Wheel Inspection Checklist for Structural Safety
A thorough inspection is the most valuable part of any carbon fibre wheelset maintenance routine. Perform a detailed check of the rims, spokes, and hubs every few months, or immediately after any significant impact, such as hitting a deep pothole.
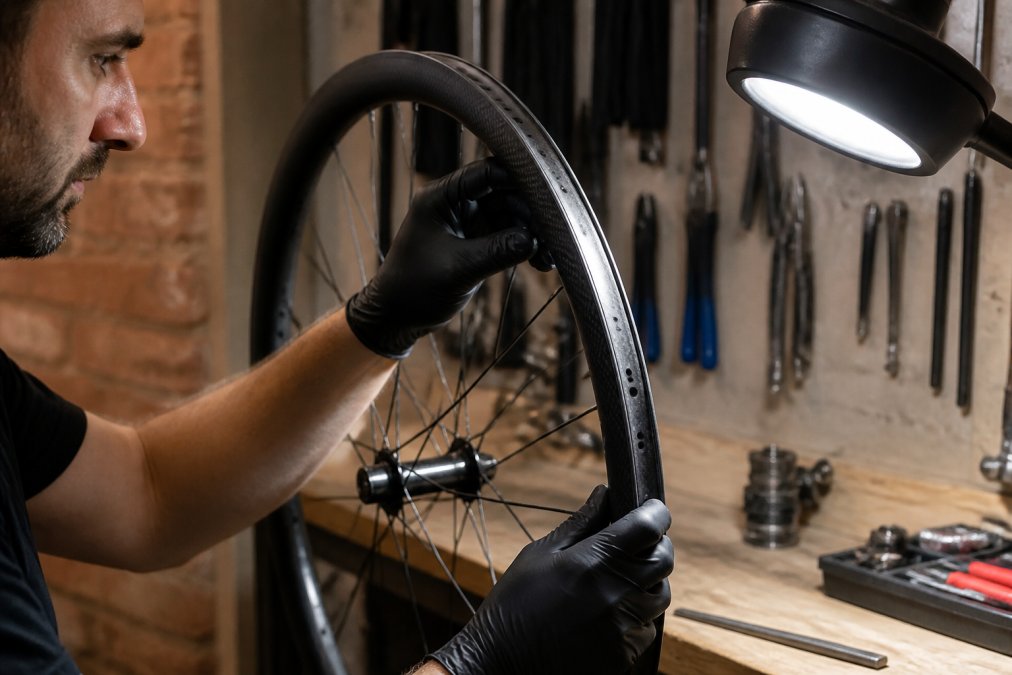
Start by running your fingers along the entire rim edge and brake track to feel for any chips, cracks, or irregularities. Look closely for hairline cracks extending from the spoke holes or the rim joint. Check the sidewalls for signs of delamination, which can appear as a cloudy or bulging area under the clear coat. If you find any structural damage, do not ride the wheel; consult a professional.
Carbon Spoke Tension Maintenance and Truing Guide
Maintaining correct spoke tension is about managing load distribution across the carbon rim. Carbon rims are stiffer than alloy, so tension imbalances translate into localised stress points that can lead to cracking at the spoke bed. Unlike steel spokes, carbon spokes do not 'bed in' over the first few hundred kilometres. A loose spoke signals a cracked nipple, a pulled spoke head, or a damaged rim bed, not normal settling.
The Tools You Need
A quality spoke tension meter is essential. The Park Tool TM-1 is a common choice, and other spoke tension meters are also available. These tools measure tension in arbitrary units, cross-referenced with a chart for your spoke gauge and rim. For a typical road wheelset with 14-gauge (2.0mm) spokes, a target range is often 100-120 kgf on the drive side rear and 60-80 kgf on the non-drive side (sheldonbrown.com). For disc brake front wheels, tension is often more even, around 100-110 kgf. These are general guidelines; your rim manufacturer's specifications take precedence.
The Step-by-Step Truing Process
- Check Tension First: Before you even look at trueness, measure the tension of all spokes on one side of the wheel. Write down the readings. A well-built wheel will have a variance of less than 10% between spokes on the same side. If you see a single spoke reading 30% lower than its neighbours, stop. Do not just tighten it. Investigate the nipple and the rim bed for cracks.
- Pluck Test as a Quick Check: If you do not have a tension meter, pluck each spoke like a guitar string. Spokes on the same side should produce a similar pitch. A noticeably lower pitch indicates a loose spoke. This is a good field test, but it is not a substitute for a meter.
- Lateral Truing (Side-to-Side): Mount the wheel in a truing stand. Spin it and find the worst lateral deviation. If the rim rubs the left caliper block at a specific spot, you need to tighten the spoke that pulls the rim to the right, or loosen the spoke that pulls it to the left. The rule is: tighten the spoke on the side you want the rim to move towards. Turn the nipple a quarter turn at a time. Re-check. If you are new to this, a quarter turn is the maximum adjustment you should make before re-spinning the wheel.
- Radial Truing (Up-and-Down): This is often more critical for carbon rims. A radial hop (a flat spot or a high spot) indicates uneven tension across the entire wheel. To lower a high spot, you need to loosen the spokes on both sides of the rim at that point. To raise a low spot, tighten both sides. Always make equal adjustments to both sides to avoid introducing a lateral wobble.
- The Quarter-Turn Rule: Never turn a nipple more than a quarter turn without re-checking the wheel. Over-tightening a single spoke can easily pull the nipple through the carbon rim bed, causing irreversible damage.
When to Stop and Call a Professional
If you need to turn a spoke more than a full rotation to correct a wobble, or if the wheel is out of true by more than 1-2 millimetres, you are beyond a simple adjustment. A significant out-of-true wheel often indicates a more serious problem, such as a broken spoke, a cracked rim, or a hub flange issue. A professional wheel builder has the experience to diagnose the root cause, not just mask the symptom.
Brake Track Care and Heat Management
For rim brake users, the brake track is the most demanding part of the wheel. Prolonged or heavy braking on long descents generates extreme temperatures that can soften the resin, leading to brake fade or structural failure. However, the most common issue is not a single catastrophic descent, but the gradual build-up of pad material and the effects of riding in wet conditions.
The Glaze and Pad Transfer Problem
When carbon-specific brake pads get hot, they deposit a thin layer of rubber compound onto the brake track. This is normal and improves braking. The problem arises when this layer becomes uneven or contaminated. If you brake hard and then stop, holding the brakes on while the wheel is stationary, you can 'weld' a patch of pad material onto the rim, creating a 'grabby' spot that causes judder. This is known as pad transfer or glazing.
The Wet Weather Mechanism
In wet conditions, water acts as a lubricant, reducing friction and heat, but it also washes away the fine layer of pad transfer that has built up. When the track dries out mid-ride, you brake on a clean carbon surface with a cold pad, making a sudden, high-friction grab more likely. Managing your braking technique is as important as cleaning the track.
The Cleaning Protocol for Glazed Tracks
- Remove the Wheel: This is non-negotiable. You cannot properly clean a brake track with the wheel on the bike.
- Use a Dedicated Degreaser: Spray a bike-specific degreaser (like Muc-Off Disc Brake Degreaser or a simple isopropyl alcohol solution) onto a clean, lint-free cloth. Do not spray directly onto the rim, as this can push contaminants into the spoke holes.
- Wipe the Track: Wipe the brake track firmly in one direction, following the curve of the rim. You will see a dark residue on the cloth. This is the old pad material and embedded grit. Flip the cloth frequently to avoid re-depositing the grit.
- Scuff the Surface: If the track is heavily glazed and braking is juddery, you may need to lightly scuff the surface. Use a fine Scotch-Brite pad (the grey or white grade, not the heavy-duty green) and gently rub the brake track in a circular motion. This is not about removing carbon; it is about breaking the smooth, glazed surface so new pad material can adhere evenly.
- Bed in the Pads: After cleaning, you must re-bed the pads. Find a safe, flat stretch of road. Accelerate to a moderate speed and brake firmly from 30 km/h to 10 km/h, without coming to a complete stop. Repeat this 5-10 times. This builds up a fresh, even layer of pad transfer and eliminates judder.
Managing Heat on Long Descents
Beyond cleaning, your technique is your best defence. On long descents, do not drag your brakes. Apply them firmly to shed speed, then release them completely to allow the rim to cool. This 'pulse braking' technique prevents heat from building up in one spot. Carbon rims dissipate heat poorly compared to alloy. If you feel the brake lever getting soft, or smell hot resin, stop and let the wheels cool completely before continuing.
Always use brake pads specifically designed for carbon rims. These pads manage heat better and lack the metallic particles found in alloy-specific pads that can score the carbon surface. Before every ride, check that your brake pads are free of embedded debris, like tiny stones or grit, which can gouge the brake track.
Hub, Bearing, and Tubeless System Service Intervals
Beyond the rims and spokes, the reliability of your wheelset depends on the hubs, bearings, and, if applicable, the tubeless sealant. Hub and bearing service intervals depend on riding conditions. In dry conditions, an annual service may suffice; in wet or dusty environments, service the hubs every six months.
For tubeless setups, the liquid sealant dries out over time and becomes less effective at sealing punctures. Check the sealant level every two to three months and top it up, and completely replace it every six months. When the tyre is off, inspect the tubeless tape for lifting or damage that could cause slow leaks.
Storage, Transport, and Knowing When to Call a Pro
How you store and transport your carbon wheelset significantly affects its lifespan. Avoid leaning the bike on the rim edge. When transporting bikes on a car rack, ensure the wheel straps do not put excessive pressure on the carbon spokes or rim. For long-term storage, keep the wheels in a cool, dry place away from direct sunlight.
Knowing when to call a professional is just as important as regular DIY care. While cleaning and visual inspections are straightforward, tasks like bearing service, hub maintenance, and correcting a significant out-of-true wheel require specific tools and torque specifications. If you are unsure about your rim's structural integrity after an impact, or notice unusual noises from the hubs, take the wheel to a professional.
Conclusion: Build a Maintenance Schedule That Sticks
| Maintenance Task | Frequency | Time Needed | Difficulty |
|---|---|---|---|
| Visual inspection for cracks and curb rash | Before every ride | 2 minutes | Easy |
| Clean rims and brake track | Every 2-4 weeks or after wet rides | 20 minutes | Easy |
| Check spoke tension and wheel trueness | Monthly | 10 minutes | Moderate |
| Service hub bearings | Every 6-12 months | 1 hour | Advanced |
| Replace tubeless sealant | Every 6 months | 30 minutes | Moderate |
The longevity of a carbon fibre wheelset comes down to consistent preventative care rather than reactionary fixes. A routine of visual checks before rides, a gentle clean when dirty, and a monthly mechanical inspection will catch most issues early. For tasks requiring specialist tools, such as bearing replacement or complex truing, professional service is a small price compared to the cost of a new rim.
At STOXbyHand, every wheelset is hand-built with precision, and we design them to be serviceable and durable. If you are unsure about your wheel's condition or need a custom build tailored to your riding style, our team can help you get the most from your investment.
Frequently Asked Questions
Is WD-40 safe on carbon fiber wheelsets?
Avoid WD-40 on carbon rims for cleaning or lubrication. It can break down the clear coat over time and leaves a residue that contaminates brake pads and tubeless tape. Use isopropyl alcohol diluted with water or a dedicated carbon-safe degreaser for stubborn grime. For drivetrain cleaning, keep spray lubricants away from the wheels entirely. A mild detergent and water handles most surface dirt without risking the composite material.
How often should I inspect my carbon wheels for structural damage?
Perform a visual check before every ride, focusing on the rim sidewalls and brake track. A thorough structural inspection with a torque check on spokes should happen every 500-800 km or monthly for regular riders. After any crash, heavy curb impact, or long gravel event, inspect immediately. Look for hairline cracks, delamination, or soft spots in the resin. If you find any, stop riding and consult a professional wheel builder.
How long do carbon wheelsets typically last?
A well-maintained carbon wheelset lasts 5-10 years or 30,000-50,000 km of riding. The carbon fibre itself does not fatigue like alloy, but the resin can degrade from UV exposure, heat from rim brakes, and impact damage. Spokes, nipples, bearings, and rim tape will need replacement during that period. Regular carbon spoke tension maintenance and hub servicing extend the wheelset's usable life significantly.
What are the signs that a carbon rim needs professional repair?
Stop riding immediately if you see hairline cracks radiating from spoke holes, delamination where the carbon layers separate, or any visible impact damage that exposes fibres. A sudden loss of spoke tension across multiple spokes or a wheel that will not true correctly also signals structural issues. Minor curb rash on the surface is cosmetic, but anything deeper than the clear coat needs a professional assessment. A professional wheel builder can perform various tests to evaluate structural integrity.
Carbon wheels are a performance investment, and protecting them requires more than a quick wipe-down. The challenge is knowing what to look for and when to act. STOXbyHand combines over 12 years of experience with hand-built precision and specialised spoke options, including carbon fibre, Berd, and TiFi polymer, to deliver wheelsets built to last. Get started with STOXbyHand and ride with confidence, knowing your wheels are maintained to the highest standard.