

Table of Contents
- Why Carbon Wheel Defects Are Easy to Miss
- Manufacturing Defects vs Damage From Use or Impact
- Your Carbon Wheel Inspection Checklist for a New Wheelset
- How to Inspect a Carbon Rim for Hidden Microfractures
- Assessing Carbon Wheel Damage After Impact
- Non-Destructive Testing and When to Use It
- Documenting Defects and Making a Carbon Wheel Warranty Claim
- Conclusion
- Frequently Asked Questions
Last Updated: October 21, 2026
Why Carbon Wheel Defects Are Easy to Miss
A carbon rim can look flawless in the stand and still hide a problem that shows up at speed. At STOXbyHand, we have hand-built carbon wheelsets for over 12 years, and the defects that hurt riders are rarely visible from a metre away.
Most inspections fail because people look at the rim like a photo, not a structure. They check the face and ignore the edges, spoke holes and inside of the bead seat.
Below, we break down how to tell a factory flaw from ride damage, then walk through a full inspection you can run in your own garage.
Manufacturing Defects vs Damage From Use or Impact
Manufacturing defects and impact damage look similar but start differently. A manufacturing defect is present from day one, even if it only becomes visible later. Impact damage happens at a known moment and usually leaves a mark in a specific spot. The distinction decides whether you have a warranty claim and whether the wheel is safe to ride: a factory flaw is the builder's responsibility, a rock strike is yours.
Where Manufacturing Flaws Tend to Appear
Factory flaws cluster in predictable spots. When a rim is moulded, the carbon layers are pressed against a bladder inside a heated tool. Voids, wrinkles and resin-rich patches form where that pressure is uneven.
Check these areas first:
- Spoke holes: cracking or fraying around the drilled hole, where fibres were cut
- The bead seat: wrinkles or gaps where the tyre bead locks in
- The brake track: uneven resin build-up or ripples on rim-brake wheels
A defect in any of these spots is a build issue, not a riding issue. Photograph it before you ride.
Your Carbon Wheel Inspection Checklist for a New Wheelset
Most inspection advice is written for damaged wheels. A new wheelset needs a different pass: you are looking for flaws present before the first ride, not trail damage.
Work in a clean, well-lit space with a bright work lamp and a small torch for raking light.
1. Finish and clear coat
Inspect the whole rim surface in raking light. Look for dull patches, pinholes, sanding marks that break through the clear coat, and cloudy or whitish weave. A cloudy patch can indicate resin-rich or resin-starved areas, or a void just under the surface. Pinholes are usually cosmetic, but ones over a visible weave disturbance deserve a closer look.
2. Bead seat and tyre interface
Run a finger around the inside of the bead seat on both sides, feeling for wrinkles, steps, gaps or rough patches where the tyre bead will lock. Wrinkles here are a layup defect, not a finish defect, and can stop the bead seating evenly.
3. Brake track (rim-brake wheels)
On rim-brake wheels, check the brake track for uneven resin build-up, ripples, or a visible step where the track meets the rim wall. A track that is not flat will pulse under braking and wear unevenly. With a caliper, measure the track width at several points; a variation of more than a few tenths of a millimetre is worth raising with the builder.
4. Spoke holes and drilling
Check every spoke hole on both the outer and inner wall for cracks radiating from the hole, chips in the clear coat, loose fibres, and rough or frayed edges where the drill exited. On the inner wall, a sharp lip or raised burr is a drilling defect.
5. Valve hole
The valve hole is a common spot for chips because it is drilled after moulding. Check the edges for chipped clear coat, exposed fibres, and any sign the drill wandered. A valve hole that is not round or sits off-centre in its reinforcement is a build issue.
6. Inner wall and rim bed
Remove any pre-fitted rim tape and inspect the inner wall with a torch and your fingers. Feel for voids, rough patches, wrinkles, and any soft spot that gives under thumb pressure. A soft spot is serious: it suggests a void or delamination in the structural layup, not a cosmetic flaw.
7. Join line and decals
On rims with a visible join, check that the seam is smooth and flush. A step at the join is a moulding defect. Check that decals and paint are not lifting at the edges, and that no clear coat has pooled in a way that hides the surface underneath.
8. Spoke tension and build
Squeeze pairs of spokes and compare tension across the wheel. Tension should feel even on the same side, with the drive side higher than the non-drive side on rear wheels. A single very loose or very tight spoke can indicate a build error or damaged spoke hole.
9. Trueness and runout
Spin the wheel in a truing stand or in the frame and watch the rim edge against a fixed reference. A new wheel should run true within the builder's stated tolerance. Note any lateral wobble or radial runout and photograph it against the reference.
10. Tap test as a screening tool
Tap around the rim with a coin and listen for a consistent ring, marking any dull section with tape. The tap test is a screening tool only; a dull sound near a spoke hole or valve hole is common and does not by itself confirm a defect.
11. Document the baseline
Photograph anything suspicious with a scale reference, note the wheel model, serial number and date received, and keep the images with your invoice. If a defect appears later, this baseline separates a warranty claim from a paid repair.
How to Inspect a Carbon Rim for Hidden Microfractures
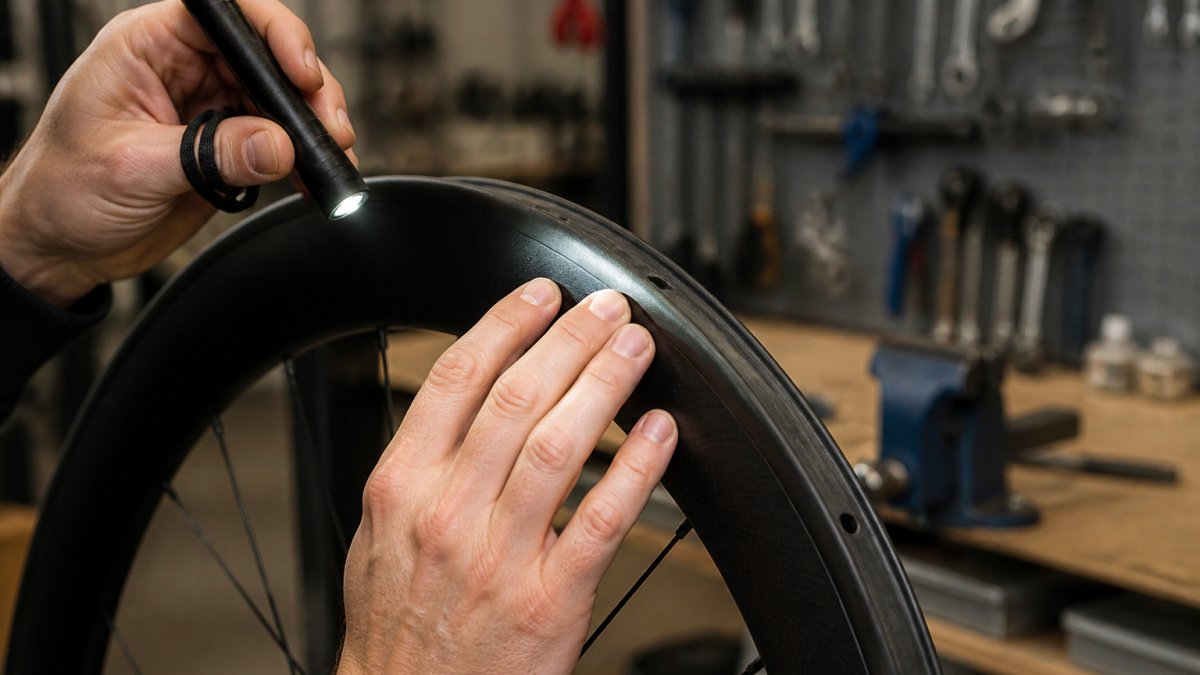
Hidden microfractures are tiny cracks in the resin or between carbon layers that do not break the surface.
Start with a visual inspection in raking light: hold a torch at a low angle and look for lines that catch the light differently from the surrounding carbon.
What the Tap Test Can and Cannot Tell You
The tap test is a quick check, not a diagnosis. Tap the rim with a coin or the handle of a small tool and listen: a clean rim gives a bright, consistent ring, while a dull or inconsistent sound can suggest a void, delamination or a crack.
Here is what the tap test cannot do:
Carbon Spoked 5031 (1281 grams) →
- It cannot measure crack depth or size
- It cannot confirm a defect is safe or unsafe
- It gives false readings near spoke holes and valve holes
Use it as a screening tool. If a section sounds dull, mark it and get it checked properly.
Assessing Carbon Wheel Damage After Impact
Impact damage is usually obvious in location, even when subtle in appearance. After a pothole, rock strike or crash, check the impact point and the areas around it.
Look for:
- Cracks radiating from the impact point
- Chips or gouges in the rim surface
- Bulges or dents that change the rim profile
Cosmetic damage is a scratch or chip in the clear coat that does not reach the carbon; structural damage reaches the fibres or layers.
Non-Destructive Testing and When to Use It
Non-destructive testing finds hidden damage without cutting the rim apart. It is worth using when visual inspection and a tap test leave doubt, or after a serious impact.
Common methods include:
- Ultrasound testing: detects voids and delamination inside the layup (pubmed.ncbi.nlm.nih.gov)
- Dye penetrant testing: shows surface-breaking cracks more clearly
- Thermography: reveals voids and disbonds through heat patterns
These tests need the right equipment and operator skill. For most riders, the practical step is to send the wheel to a specialist or back to the builder.
Documenting Defects and Making a Carbon Wheel Warranty Claim
A warranty claim is an evidence exercise. The builder was not there when the defect appeared, so your file has to tell the story. Build it before you contact anyone, and keep it factual rather than emotional.
Build the defect file
Start with photographs: wide shots showing the whole wheel and the defect in context, then close-ups with a scale reference (a steel rule or a coin) beside the mark.
Record the facts in writing:
- Wheel model, size, and serial number
- Date received and date the defect was first noticed
- Whether the wheel had been ridden, and how far
Keep the original invoice, build sheet, and any correspondence. If the wheel was supplied through a shop, keep the shop's details in the file as well.
Separate defect from damage in the claim
Manufacturers assess claims on cause, not appearance. A defect present from manufacture is their responsibility; damage from a rock strike, pothole or crash is not.
A manufacturing defect typically shows:
- A mark with no corresponding impact point
- Cracking or fraying around a spoke hole or valve hole with no surrounding scuffing
- Wrinkles or voids on the inner wall or bead seat
Impact damage typically shows:
- A localised scuff, chip, or gouge at the point of contact
- Cracks radiating from that point
- Damage on one side only, consistent with a strike
If you are unsure, say so in the claim and ask the builder to assess it. Do not overstate the case; a clear, honest file is more persuasive than a dramatic one.
Contact the builder or retailer
Send the file to the point of purchase first, whether builder or shop. Most carbon wheel warranties cover manufacturing defects for a set period, and many offer a crash replacement discount for impact damage.
Keep a record of every contact: date, name and what was agreed. If the wheel is returned, photograph it before packing and ask for the tracking number.
What to expect from the assessment
The builder will usually inspect the wheel visually and may use a tap test or non-destructive testing such as ultrasound to check for internal voids or delamination; some cut a section in serious cases. Ask what method was used and what it found. If the claim is rejected, ask for the reason in writing so you can decide whether to seek a second opinion.
Conclusion
Carbon wheel defects are easy to miss because carbon fails quietly, and the difference between a factory flaw and ride damage is not always visible. A structured inspection, a documented baseline and a proper test when something looks wrong will protect both your wallet and your safety.
If you want a wheelset built to a standard you can verify, STOXbyHand hand-builds every wheel in NSW to 0.1mm trueness, with uniform spoke tensions and EPS internal moulding to reduce voids. Our Carbon Spoked 5031 (1281 grams) 2020 is available for $2,400.00 and carries a three-year warranty on manufacturing defects.
Frequently Asked Questions
How can you tell if a carbon wheel has a manufacturing defect?
Look for flaws present before any ride: voids or resin-rich patches under the clear coat, uneven rim surfaces, loose or inconsistent spoke tension, and spoke holes with rough edges. A tap test that produces a dull or inconsistent sound across a new rim is a warning sign. Manufacturing defects in carbon wheel defects usually show up on the first inspection, so check the wheelset thoroughly before fitting tyres and riding. If something looks off, photograph it and contact the builder before use.
How do you inspect a carbon rim for hidden microfractures?
Start with a bright light and a clean cloth, then run a fingernail across the rim surface to feel for hairline steps or catches. Tap around the rim with a coin and listen for a change from a clear ring to a dull thud. Check spoke holes and the bead hook closely. The tap test is a screening tool, not proof, so any suspicious area should go to a qualified inspector for ultrasound or dye penetrant testing before you ride.
Can you ride a carbon wheel with a small crack or surface mark?
A cosmetic chip in the clear coat is usually safe, but any crack that catches a fingernail, any bulge, or any soft spot means stop riding. Carbon wheel damage after impact can hide beneath an intact surface, so a mark near a spoke hole or bead hook deserves a proper inspection. If in doubt, treat it as structural damage and have it assessed. Riding a compromised rim risks a wheel failure at speed.
How should you document a suspected carbon wheel defect for a warranty claim?
Photograph the defect from multiple angles with a scale reference, note the wheel serial number, purchase date and kilometres ridden, and keep your original receipt. Write a short description of when you first noticed it and whether the wheel had any impact. Send this to the builder before attempting any repair. A clear record of carbon wheel defects helps the warranty assessment and avoids disputes about whether the issue was manufacturing or impact related.