

Table of Contents
- What Spoke Tension Actually Is and Why It Matters
- Tools You Need to Measure Spoke Tension
- Spoke Tension Meter Calibration: Getting Accurate Readings
- How to Measure Spoke Tension Step by Step
- Recommended Spoke Tension for Carbon Rims
- Building Wheels for Heavy Riders and High-Torque Setups
- Troubleshooting Common Tensioning Mistakes
- Frequently Asked Questions
Last Updated: September 11, 2026
What Spoke Tension Actually Is and Why It Matters
Spoke tension is the pulling force a spoke exerts on the rim and hub, measured in kilogram-force (kgf), and it is the single variable that determines whether a wheel stays true, carries load, and survives rough terrain. A wheel is not a rigid disc; it is a pre-stressed structure held in shape by opposing forces. We have over 12 years of experience building hand-built carbon wheelsets, and the one number that decides whether a wheel lasts a season or five is tension.

Get this wrong and the symptoms appear in sequence. Loose spokes unload under load, the rim flexes further than designed, and the wheel loses lateral stiffness. Keep reading, because the difference between a wheel that feels fast and one that feels vague comes down to how evenly those forces are distributed.
The Physics of Spoke Fatigue
Every rotation flexes each spoke slightly as it passes through the contact patch, and that repeated cycle is what eventually breaks spokes, not one big impact. A spoke that is too loose moves through a wider range of motion with every revolution, which accelerates fatigue at the elbow and nipple. A spoke under correct tension barely changes length, so the cycle is smaller.
This is why tension balance matters as much as absolute tension. One slack spoke in an otherwise well-built wheel will fail first, and when it does, the load redistributes to its neighbours.
Tools You Need to Measure Spoke Tension
The essential tool is a spoke tension meter, also called a tensiometer, which converts the deflection of a spoke under a known spring load into a tension reading. You cannot judge tension accurately by plucking alone, though spoke pitch gives a rough cross-check once you have calibrated your ear.
A basic kit includes:
- Spoke tension meter with the manufacturer's conversion table
- Nipple wrench sized to your spoke nipples
- Wheel truing stand with adjustable arms
- A tensiometer calibration block or reference spoke
- Digital calipers for measuring spoke gauge and rim dimensions
For carbon rims, add a torque-limited spoke key. Alloy nipples on a carbon bed deform easily, and overtightening one nipple can crack the rim bed.
Spoke Tension Meter Calibration: Getting Accurate Readings
A tension meter is only as good as its calibration, and this is the step most home mechanics skip. The meter reads deflection, not tension, so you rely on a conversion table that assumes the tool is within spec. Over time the spring weakens and readings drift.
Check calibration before every serious build. Most meters come with a calibration block or a known reference spoke; if the reading falls outside the stated tolerance, the tool needs service or replacement. Record your calibration date on the build sheet so you can trace any later inconsistency.
Park Tool's guide to tension meter calibration
Temperature also affects readings. A meter left in a cold garage reads differently from one at room temperature, so let the tool stabilise before you trust the numbers.
How to Measure Spoke Tension Step by Step
Measuring tension takes about 15 minutes per wheel once you have a rhythm. Work systematically around the wheel rather than jumping between spokes.
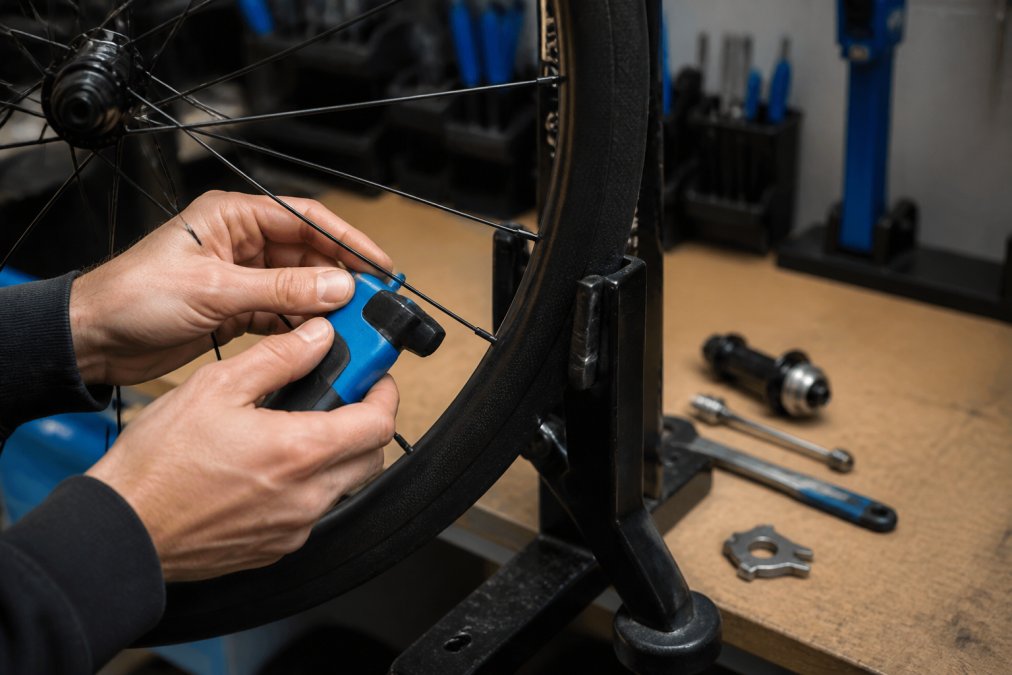
- Mount the wheel in the truing stand and confirm it spins without lateral runout.
- Identify the spoke pattern and note drive-side versus non-drive-side, or disc-side versus non-disc-side.
- Zero the tension meter and place it on the first spoke at a consistent point, midway between hub flange and rim.
- Deflect the spoke, read the value, and convert it using the table for that spoke gauge.
- Record every reading in a chart, working clockwise around the wheel.
- Repeat on the opposite side and compare averages.
- Flag any spoke more than a set deviation from the average for correction.
Expected result: a chart showing consistent readings within your target range on each side, with no outliers.
Reading Tension Balance and Uniformity
Tension balance describes how evenly tension is distributed around the wheel; tension uniformity describes how consistent it is between the two sides. On a rear disc wheel with a symmetric rim, drive-side and non-drive-side tension can differ substantially because of the dish required to fit the cassette. An asymmetric rim profile reduces that gap by offsetting the spoke bed.
When you review your chart, look at the spread, not just the average. A tight cluster of readings around the target is a healthy wheel. A wide spread means some spokes are doing more work than others.
Recommended Spoke Tension for Carbon Rims
Carbon rims generally accept higher tension than alloy, but the rim manufacturer's maximum rating is the ceiling, not a target. Exceeding it risks cracking the rim bed, and the failure is usually sudden rather than gradual.
A practical approach:
- Set the target below the rim's stated maximum, leaving headroom for stress relieving.
- Keep side-to-side averages within a sensible range of each other.
- Check the rim's maximum tension rating before you start, and never assume it matches your last build.
Material-Specific Tension Guidelines
Most guides treat all rims the same, but carbon and alloy behave differently under spoke load. Alloy rims typically tolerate a narrower tension window because the material yields more readily at the nipple bed. Carbon rims can be run higher, but the failure mode is brittle fracture rather than gradual deformation.
A common pattern among wheelbuilders is to target the lower half of the rim's stated maximum for alloy, and the middle of the range for carbon. For example, if a rim is rated to 130 kgf, an alloy build might sit around 100-110 kgf, while a carbon build might sit around 110-120 kgf. These are illustrative ranges, not universal rules, always defer to the rim manufacturer's specification.
Tension Conversion Charts and Mobile-Friendly References
Static conversion tables are hard to read on a phone in the workshop. If you are using a tension meter with a printed table, consider photographing it or saving a digital copy so you can zoom in. Some meters now come with app-based conversion tools that let you input the spoke gauge and get a reading instantly.
When using a table, pay attention to the spoke gauge and material, a 2.0 mm stainless spoke and a 1.8 mm butted spoke will read differently at the same deflection. Always match the table to the exact spoke you are measuring.
The Physics of Spoke Fatigue in Carbon Wheels
Carbon rims transmit load differently from alloy. Because carbon is stiffer, the spoke does more of the flexing, which means tension accuracy matters even more. A spoke that is too loose will move through a wider range of motion with every revolution, accelerating fatigue at the elbow and nipple. A spoke under correct tension barely changes length, so the cycle is smaller.
This is why tension balance matters as much as absolute tension. One slack spoke in an otherwise well-built wheel will fail first, and when it does, the load redistributes to its neighbours.
Building Wheels for Heavy Riders and High-Torque Setups
Heavier riders and e-bike conversions load wheels differently, and the build has to account for torque as well as weight. A hub motor applies drive torque through the spokes, and a heavy rider adds sustained radial load. Both increase the case for higher spoke counts, thicker gauges, and more even tension.
For these builds, we favour asymmetric rims because they even out spoke tensions between the drive and disc sides, which is where symmetric rims struggle most. Lacing choice matters too: a three-cross pattern distributes torque over more spokes than a radial or two-cross build.
If you are coming from an off-the-shelf wheelset, a hand-built wheel may feel firmer under cornering, not because it is stiffer in isolation but because the tension is consistent.
Tensioning for Specific Rim Materials (Carbon vs. Alloy)
Most guides treat all rims the same, but carbon and alloy respond differently to spoke tension. Alloy rims typically tolerate a narrower tension window because the material yields more readily at the nipple bed. Carbon rims can be run higher, but the failure mode is brittle fracture rather than gradual deformation.
For heavy riders, alloy rims may need to be kept closer to the lower end of their range to avoid fatigue, while carbon rims can be run nearer the middle of their range for better load distribution. Always check the rim manufacturer's maximum tension rating before you start.
Troubleshooting Common Tensioning Mistakes
Most tensioning problems trace back to a handful of repeatable errors. The most common is chasing trueness by tightening single spokes rather than adjusting pairs, which builds a wheel that is straight but unevenly tensioned.
Other frequent mistakes:
- Spoke wind-up: the spoke twists instead of turning the nipple, so the reading lies. Hold the spoke blade with a second tool while you turn the nipple.
- Skipping stress relieving: without it, tensions settle after the first ride and the wheel goes out of true.
- Measuring at inconsistent points: always deflect at the same spot along the spoke.
- Ignoring radial runout: a wheel can be laterally true and still hop.
Tension and Wheel Dish: Keeping the Rim Centred
Wheel dish is the lateral offset of the rim relative to the hub axle, and it is controlled entirely by the relative tension of the two spoke sides. Increase tension on one side and the rim moves toward it. This is why dish and tension are inseparable: you cannot correct dish without changing tension, and you cannot balance tension without checking dish.
For a rear wheel, the cassette side usually runs higher tension to pull the rim into alignment. Asymmetric rims reduce how much extra tension that requires, which keeps both sides closer to the target and lowers the risk of overloading the drive side.
Sheldon Brown's wheelbuilding reference on dish and tension
Troubleshooting Common Tensioning Mistakes
Most tensioning problems trace back to a handful of repeatable errors. The most common is chasing trueness by tightening single spokes rather than adjusting pairs, which builds a wheel that is straight but unevenly tensioned.
Other frequent mistakes:
- Spoke wind-up: the spoke twists instead of turning the nipple, so the reading lies. Hold the spoke blade with a second tool while you turn the nipple.
- Skipping stress relieving: without it, tensions settle after the first ride and the wheel goes out of true.
- Measuring at inconsistent points: always deflect at the same spot along the spoke.
- Ignoring radial runout: a wheel can be laterally true and still hop.
Tension and Wheel Dish: Keeping the Rim Centred
Wheel dish is the lateral offset of the rim relative to the hub axle, and it is controlled entirely by the relative tension of the two spoke sides. Increase tension on one side and the rim moves toward it. This is why dish and tension are inseparable: you cannot correct dish without changing tension, and you cannot balance tension without checking dish.
For a rear wheel, the cassette side usually runs higher tension to pull the rim into alignment. Asymmetric rims reduce how much extra tension that requires, which keeps both sides closer to the target and lowers the risk of overloading the drive side.
Sheldon Brown's wheelbuilding reference on dish and tension
Frequently Asked Questions
What tension should spokes be at?
There is no single number because it depends on the rim, spoke count and material. Most alloy rims sit around 100-120 kgf, while carbon rims are usually rated lower, often 90-110 kgf. Always check the rim manufacturer's maximum tension rating and aim for the drive side of a rear wheel at that figure. The non-drive side will read lower, roughly 50-60% of the drive side on a dished wheel. Use a calibrated spoke tension meter rather than guessing by plucking.
What happens if spoke tension is too low?
Low tension lets spokes go slack under load, so the wheel flexes, the rim moves laterally and nipples can unwind. The spokes also bend repeatedly at the hub flange, which accelerates spoke fatigue and leads to breakage. On a rear wheel it usually shows up as a wheel that will not stay true and a vague, flexy feel when you push hard. Raising tension to the rim's recommended range restores stiffness and stops that movement.
Should spoke tension be the same on both sides?
No. On a rear wheel with a cassette, the drive side has a shallower bracing angle, so it needs higher tension to hold the rim in dish. A typical target is drive side at the rim's maximum and non-drive side around 50-60% of that. Asymmetric rims, like those used on STOXbyHand gravel and mountain builds, even out the spoke pitch and reduce that difference, so both sides share load more evenly and the wheel stays truer for longer.
How can you accurately measure spoke tension at home?
Use a spoke tension meter (tensiometer) with a conversion chart for your spoke gauge and material. First calibrate the meter, then squeeze each spoke at the same point, usually mid-span, and record the deflection reading. Convert that to kilogram-force using the chart. Check drive and non-drive sides separately, and look for tension deviation across the wheel, not just the average. A wheel is only as good as its most uneven pair of spokes.
Tensioning a wheel by feel alone works until it doesn't, and carbon rims are unforgiving when a build drifts out of balance. STOXbyHand builds every wheelset by hand with tension charted at each stage, using asymmetric rim profiles, Berd and TiFi polymer spoke options, and over 12 years of accumulated build data to match tension to your weight, terrain, and riding style. Get started with STOXbyHand and ride a wheelset that holds its tension long after the first service.