

Table of Contents
- Why Hub Motors Destroy Wheels: E-Bike Wheel Failure Causes
- Choosing the Right Heavy-Duty E-Bike Spoke Gauge and Nipples
- Hub Motor Lacing Patterns for Torque Transfer
- Rim Selection: ERD, Eyelets, and Structural Integrity
- Step-by-Step: Building and Truing Your High Torque E-Bike Wheel
- Maintenance Schedules and Stress Relieving for Longevity
- Build It Yourself or Have It Built Professionally?
- Frequently Asked Questions
The Real Cost of Ignoring High Torque E-Bike Wheel Builds
A hub motor can generate enough torque to twist a standard bicycle wheel into a pretzel within a few hundred kilometres (ebikes.ca). The rotational force delivered through a single point on the hub shell places stress on spokes, nipples, and rims that conventional wheels were never designed to handle. We have seen the consequences of underestimating this force.
Most riders discover this after a catastrophic failure, not before. A wheel that collapses at speed is dangerous, and the cost of replacing a damaged motor, frame, or rider is far higher than building correctly the first time. This guide covers the physics of torque transfer, the components that survive it, and the step-by-step process for building a wheel that stays true under sustained load.
Ignoring the demands of high torque e-bike wheel builds typically results in premature spoke breakage, rim cracking, and loss of true within the first few months of operation. The most common failure mode is spoke fatigue at the elbow, where the spoke bends to meet the hub flange. Under high torque, this point experiences cyclic loading that exceeds the fatigue limit of standard spokes.
A single failed spoke often damages adjacent spokes and the rim, turning a minor repair into a full rebuild. The cost of labour and replacement parts repeatedly exceeds the upfront investment in a properly designed wheel.
Why Hub Motors Destroy Wheels: E-Bike Wheel Failure Causes
Hub motors concentrate torque at the centre of the wheel, transmitting force through the spokes to the rim and tyre. Unlike a cassette hub where the rider's power is applied gradually, a high-amp controller can deliver near-instantaneous torque, creating a tangential load on the spokes that standard wheels cannot absorb.
The primary e-bike wheel failure causes fall into three categories: spoke gauge too thin, lacing pattern that does not transfer torque efficiently, and a rim lacking structural integrity. The hub motor shell itself is often heavier than a standard hub, adding unsprung mass that increases impact forces on the rim. The wheel must be engineered as a system around the motor's torque output.
Choosing the Right Heavy-Duty E-Bike Spoke Gauge and Nipples
The correct heavy-duty e-bike spoke gauge for most hub motor builds is 13-gauge or 12-gauge, measured at approximately 2.3 mm to 2.6 mm in diameter (sheldonbrown.com). Standard 14-gauge spokes at 2.0 mm lack the tensile strength and fatigue resistance required for sustained high-torque application.
Reinforced spokes with a thicker gauge at the elbow and thread are a worthwhile investment, as the elbow is the point of highest stress concentration. For nipples, brass is preferred over aluminium: brass withstands higher torque during tightening and resists corrosion. A common mistake is using lightweight aluminium nipples to save grams on a wheel that already carries a heavy motor.
Hub Motor Lacing Patterns for Torque Transfer
The lacing pattern is not a stylistic choice; it is the mechanical pathway that converts the motor's rotational force into forward motion. The critical factor is the bracing angle, the angle at which the spoke leaves the hub flange relative to the tangent of the flange's rotation, which determines how much of the spoke's tension resists the motor's torque.
A radial lacing pattern, where spokes point directly from the hub centre to the rim, has a bracing angle of zero degrees (wheelbuilder.com). The spoke is perfectly aligned with the radial force of the wheel's weight but offers no resistance to tangential force. When a hub motor applies torque, the hub shell tries to rotate within the wheel, and with no component of spoke tension to counteract this, the hub slips and the spokes slacken instantly. Radial lacing is catastrophic on a hub motor.
Cross-lacing patterns, such as 2-cross, 3-cross, and 4-cross, introduce a tangential component to the spoke's path. Each crossing creates an angle relative to the radial line, allowing the spoke to act as a lever arm that transfers the hub's rotational force into tensile stress. The greater the number of crosses, the larger this angle and the more effectively the spoke handles high torque.
For most hub motors, a 3-cross pattern is the industry standard, handling the torque of typical 1,500-watt to 3,000-watt hub motors without compromising lateral stiffness. For extreme torque applications, motors exceeding 5,000 watts or heavy cargo or off-road builds, a 4-cross pattern is often superior, creating a larger bracing angle for higher torque transfer without over-stressing the spoke elbows. The trade-off is a slightly less stiff wheel laterally and a more complex lacing process.
The choice between 3-cross and 4-cross depends on the hub flange diameter and the rim's spoke hole count. A larger flange diameter allows for a more acute bracing angle, achieving similar torque transfer with fewer crosses; a smaller flange diameter requires more crosses. When calculating spoke length, input the exact flange diameter and chosen cross pattern into a spoke calculator, a miscalculation results in spokes too short to engage nipple threads or too long, protruding through the nipple and puncturing the rim tape.
On a standard bicycle hub, the drive side has a larger flange to accommodate the cassette, creating a dish in the wheel. Hub motors often have symmetrical flanges, but torque is applied equally to both sides, so both must be tensioned to similar levels. A common mistake is tensioning the non-drive side lower to correct for dish; on a hub motor, this creates an imbalance leading to premature spoke failure on the higher-tensioned side.
In a cross-laced wheel, each spoke is either a leading spoke (pulling the hub forward) or a trailing spoke (pushing the hub backward). Under motor acceleration, the trailing spokes take the primary load and are pulled taut as the hub rotates forward, while leading spokes experience a reduction in tension. In a 36-spoke wheel, 18 trailing spokes do the heavy lifting during acceleration. A high-torque build must ensure these trailing spokes are thicker and have the correct elbow bend to distribute stress. Some builders recommend slightly higher tension on trailing spokes to account for dynamic load, though this must be done carefully to avoid rim distortion.
A practical test for a properly laced high-torque wheel is to apply the motor's full torque while the wheel is off the ground and listen for creaking or popping sounds, which indicate micro-slippage at the spoke nipple or flange. A well-laced wheel should be silent under load; if you hear creaking, the lacing pattern or tension needs revision before riding.
Rim Selection: ERD, Eyelets, and Structural Integrity
Rim selection begins with the Effective Rim Diameter (ERD), the critical measurement for calculating spoke length. An incorrect ERD results in spokes too long, bottoming out in the nipple, or too short, failing to engage enough thread. Always measure the ERD of your specific rim rather than relying on manufacturer specifications.
Eyelet reinforcement is non-negotiable for high-torque builds. Eyelets distribute spoke tension across a wider area of the rim, preventing the nipple from pulling through the rim bed under load. Rims designed for e-bike use feature heavier extrusion profiles and reinforced spoke beds. Look for rims with a wider internal width for better tyre support and rim integrity under impact. A lightweight road rim is a poor choice for a hub motor build; the rim must be matched to the total system weight, including the motor, battery, and rider.
Step-by-Step: Building and Truing Your High Torque E-Bike Wheel
Building a high torque e-bike wheel requires patience and precision. The process takes several hours for an experienced builder and should not be rushed.
- Prepare the hub and rim. Clean the hub flange and confirm the rim's ERD. Apply a light grease to the spoke threads and nipple seats to ensure accurate torque readings.
- Calculate spoke length. Use a reliable spoke calculator with the specific hub flange diameter and rim ERD for the chosen lacing pattern.
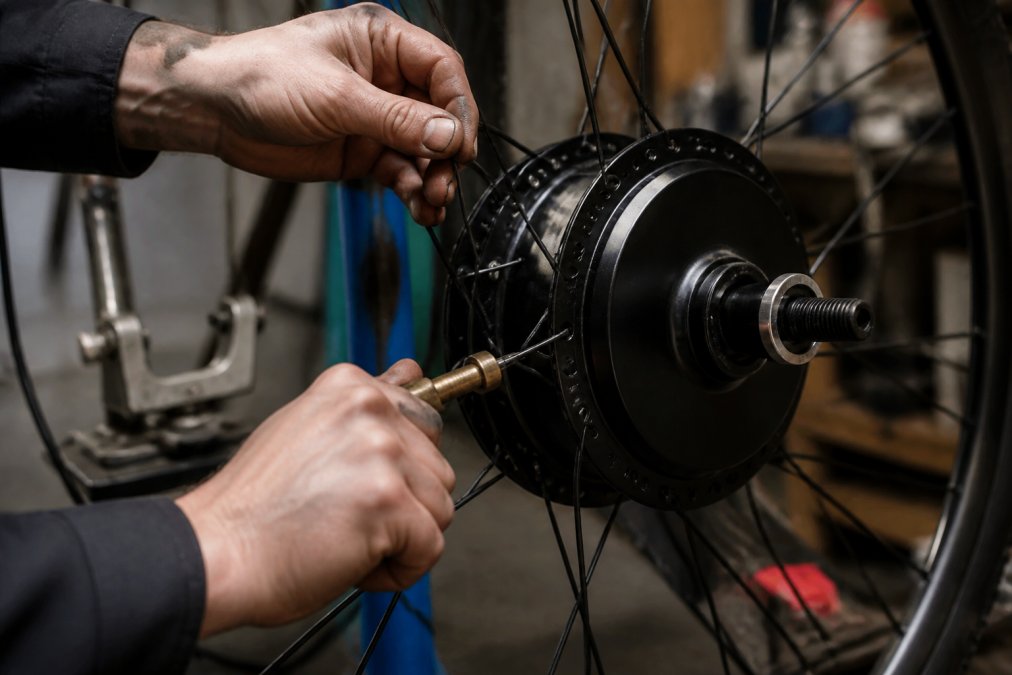
- Lace the wheel. Start with the first cross pattern, working systematically around the hub. Ensure each spoke is correctly seated in the flange.
- Initial tensioning. Tighten all nipples evenly in small increments, bringing the wheel to roughly 80% of final spoke tension.
- True the wheel. Use a truing stand to correct lateral runout (side-to-side wobble) and radial runout (hop). This is a slow, iterative process.
- Stress relieve. After truing, flex the spokes at the hub to seat the elbows and relieve manufacturing stress. Re-tension and re-true.
- Final tension check. Use a spoke tension meter to verify the tension is even across all spokes and within the rim's recommended range.
A common mistake is skipping the stress-relieving step. New spokes settle and stretch slightly under initial load. If you do not stress relieve during the build, the wheel will go out of true after the first ride. The final result should be a wheel with zero lateral runout and consistent spoke tension across all 32 or 36 spokes.
Maintenance Schedules and Stress Relieving for Longevity
High torque e-bike wheel builds demand a fundamentally different maintenance cadence than standard bicycle wheels. A hub motor delivers torque in a pulsating manner, especially with a square-wave controller. Each pulse is a micro-impact that sends a shockwave through the spokes, accelerating material fatigue in the aluminium rim and steel spokes.
Material fatigue is governed by the S-N curve (Stress vs. Number of cycles), which describes how a material's fatigue life decreases as applied stress increases. For a high-torque e-bike wheel, cyclic stress on the spokes is significantly higher than on a standard wheel, so the wheel reaches its fatigue limit much sooner. A spoke that might last 20,000 kilometres on a pedal bike may only last 5,000 kilometres on a high-torque hub motor if tension is not meticulously managed. The most vulnerable point is the spoke elbow, where the metal is bent and has residual stress from manufacturing.
A maintenance schedule for a high-torque build must be more aggressive than the standard advice of checking tension every few months:
- First 100 km: After the initial build, ride gently for the first 100 kilometres. Then, perform a full tension check and stress-relieve the wheel. This is the critical bedding-in period where the spokes settle into their seats at the hub flange and nipple.
- Every 500 km for the first 2,000 km: Check spoke tension with a tension meter. Do not rely on the 'ping' test, as thicker 12-gauge or 13-gauge spokes produce a different acoustic frequency that is difficult to judge by ear. A tension meter is non-negotiable. Look for any deviation of more than 10% between the highest and lowest tensioned spokes. If you find a loose spoke, do not simply tighten it in isolation. Loosen the adjacent spokes, re-tension them all evenly, and then re-true the wheel.
- Every 1,000 km thereafter: Perform a full inspection. This includes checking for any signs of spoke nipple cracking, rim wear at the spoke bed, and any lateral or radial runout. Use a truing stand to measure runout. A lateral runout of more than 0.5 mm is a warning sign that the wheel is losing its structural integrity.
- Every 5,000 km or after any major impact: Consider a full stress-relief cycle. This involves deliberately flexing the spokes at the hub to seat the elbows and relieve any built-up stress. This is not just a one-time event during the build. It is a maintenance procedure that extends the fatigue life of the spokes.
Stress relieving is not about making spokes stronger; it is about redistributing internal stress within the metal. When a spoke is tensioned, the outer fibres are in tension and the inner fibres in compression; under cyclic loading, these stress gradients can lead to micro-cracks. Stress relieving involves over-flexing the spoke to yield the metal slightly, equalising stress distribution across the cross-section and making the spoke more resilient to cyclic loads. A common technique is to grab two adjacent spokes near the hub and squeeze them together firmly, then release, around the entire wheel, then re-check tension and true.
The rim itself is also subject to material fatigue. High torque can cause the rim to flex slightly with each rotation, especially at the spoke bed, causing the aluminium to work-harden and become brittle, leading to cracks around the spoke holes. This is why eyelets are essential, they distribute the load over a wider area, reducing stress concentration at the nipple seat. Even with eyelets, the rim has a finite fatigue life; a heavy-duty e-bike rim may need replacement after 10,000 to 15,000 kilometres of hard use, even if it appears visually sound. Inspect the rim bed for hairline cracks during each major maintenance interval.
A 'torque cycle log' is a useful tool. Track your riding style and controller settings: if you frequently use maximum throttle from a standstill, you are subjecting the wheel to the highest possible torque spikes, while riders who use a torque-sensing controller or start gently experience fewer fatigue cycles. By logging your riding habits, you can better predict when your wheel will need maintenance, a rider who does 50 km/h standing starts will need to check tension more frequently than one who uses a gentle throttle ramp.
Build It Yourself or Have It Built Professionally?
The decision between a DIY build and a professional build comes down to tools, experience, and risk tolerance. A DIY build requires a truing stand, a spoke tension meter, a dishing tool, and several hours of focused work. The cost of these tools is comparable to the labour cost of a single professional build. If you plan to build multiple wheels, the investment pays off. For a single build, professional assembly is often more economical.
The more significant factor is experience. Wheel building is a craft that takes years to master; a professional builder understands the nuances of spoke tension, dish alignment, and stress relieving that are difficult to convey in a guide. We apply over 12 years of wheel-building experience to every build. Our hand-built carbon fibre wheelsets are designed for riders who demand performance and reliability, and we offer specialised spoke options including carbon fibre, Berd, and TiFi polymer to suit specific riding styles.
The cost-benefit analysis depends on your own skills and the value you place on your time. If you are building a wheel for a high-torque e-bike that will be ridden daily, the peace of mind from a professionally built, guaranteed wheel is difficult to quantify but very real. The risk of a failed DIY build is not just the cost of parts, but the potential for a serious crash.
Building a high torque e-bike wheel is a technical challenge that rewards careful planning and quality components. The physics of torque transfer demand a wheel built with the correct spoke gauge, lacing pattern, and rim structure, and maintained with a disciplined schedule. Whether you build yourself or trust a professional, the principles remain the same. Combining over 12 years of hand-building expertise with advanced materials can deliver wheelsets engineered for durability under demanding conditions.
Frequently Asked Questions
What is the best spoke pattern for a high torque hub motor?
For high torque hub motors, a 3-cross lacing pattern is the standard recommendation. This pattern creates a more tangential angle for the spokes relative to the hub flange, which is more effective at transmitting rotational force without putting excessive stress on the spoke heads. While a 2-cross pattern is easier to build, it results in a more radial pull, which increases the risk of spoke breakage under the high-amp, high-torque conditions of an electric drive system.
What spoke gauge should I use for a heavy-duty e-bike wheel build?
For most high torque e-bike builds, a 13-gauge or 12-gauge spoke (2.3mm to 2.6mm) is the appropriate choice. These thicker spokes offer a higher tensile strength and fatigue resistance compared to standard 14-gauge or 15-gauge road spokes. The larger cross-section provides more material to resist the cyclical loading and stress from a motorized hub, reducing the likelihood of fatigue failure at the spoke head or elbow.
Why do spokes keep breaking on my e-bike wheel?
Spoke breakage on e-bikes is rarely a single issue. Common e-bike wheel failure causes include incorrect spoke tension leading to uneven load distribution, a lacing pattern that is too radial for the torque load, and using a standard spoke gauge not rated for the motor's output. Additionally, a rim with an insufficient ERD or lacking eyelet reinforcement can fail under the concentrated stress of high spoke tension required for a reliable build.
Can I use a carbon fibre rim for a high torque hub motor build?
Yes, but only if the rim is specifically designed for the demands of a motorized hub. You need a rim with a high spoke count (36 holes is safer than 32), reinforced spoke beds or eyelet reinforcement, and a manufacturer rating that explicitly states it is suitable for e-bike use. Many lightweight carbon rims are not built to withstand the sustained high torque and heat of an electric drive system and will fail at the nipple seating.