

Table of Contents
- Understanding Berd Spokes and Carbon Rim Compatibility
- Preparing Your Hub and Rim for Installation
- Essential Wheel Building Tools for Berd Spokes
- Step-by-Step Installation Sequence
- Berd Spokes Tensioning and Wheel Truing
- Common Installation Mistakes and Troubleshooting
- Berd Spokes Maintenance and Long-Term Care
- When to Seek Professional Help
- Frequently Asked Questions
Last Updated: October 9, 2026
Understanding Berd Spokes and Carbon Rim Compatibility
Berd spokes are polymer spokes made from Dyneema, an ultra-high-molecular-weight polyethylene with 15 times the strength-to-weight ratio of steel. Installing Berd spokes on carbon rims requires understanding the limitations of both components, as carbon rims and polymer spokes have different tolerances than traditional steel builds.
At STOXbyHand, we use over 12 years of specialised experience. A durable wheel comes down to respecting these material constraints.
Why Carbon Rims Require Special Attention
Carbon rims are stiffer than aluminium and do not flex under tension the way metal does. Berd spokes have a maximum tension limit of 100 kilogram-force (kgf), versus 120 kgf for steel.
Carbon rims also have spoke holes that can be damaged by improper nipple seating.
The real challenge: carbon rims on disc brake wheels are often asymmetric, with tighter bracing angles on the drive side.
Berd Spoke Specifications and Limitations
The material is impervious to rust and corrosion and damps vibrations better than steel or carbon fibre, which is why Berd spokes excel in gravel and endurance riding.
The trade-offs are real:
- Maximum tension: 100 kgf (non-negotiable)
- Elasticity: Lower than steel, which means less forgiveness for assembly errors
- Cost: Significantly higher than steel or standard carbon fibre
- Brittleness: Berd spokes can snap under sudden overload or improper handling
Berd spokes also require Berd-approved flanged hubs, as the spoke hole diameter and flange design must match Berd specifications.
Preparing Your Hub and Rim for Installation
Before you touch a single spoke, your hub and rim must be ready. This preparation determines whether your wheel stays true or develops problems within weeks.
Hub Preparation and Spoke Hole Inspection
Clean the hub flanges with a soft brush and mild soap to remove dust, grease, or debris from the spoke holes.
Check that your hub is compatible with Berd spokes.
Next, verify that your hub flanges are parallel. Place the hub on a flat surface and spin it; the flanges should rotate without wobbling.
Selecting the Right Spoke Length
Spoke length is calculated based on:
- Rim diameter and internal width
- Hub flange diameter and width
- Lacing pattern (radial, cross-2, cross-3, etc.)
For Berd spokes, use a Berd-specific spoke length calculator. Standard calculators often add 1-2 mm because they assume steel spoke elasticity, and Berd spokes are stiffer so they need to be slightly shorter.
If you're unsure of the exact length, order samples in two lengths, say 280 mm and 282 mm, and test-fit them.
Ordering the wrong length is expensive and time-consuming. Measure twice, order once.
Essential Wheel Building Tools for Berd Spokes
You cannot build a wheel properly without the right tools. Berd spokes demand precision, and cheap tools will fail you.
Essential tools:
- Wheel building stand (adjustable, with true gauges)
- Spoke wrench (correct size for your nipples, usually 3.5 mm)
- Tension meter (critical for Berd spokes)
- Truing gauge (lateral and radial)
- Nipple driver or spoke key
- Callipers for spoke length verification
- Soft-bristle brush for cleaning
Optional but highly recommended:
- Dishing gauge (to verify centring on asymmetric rims)
- Spoke protector (to prevent nipple damage during tensioning)
- Torque wrench (for final tension verification)
The tension meter is non-negotiable for Berd spokes. A Park Tool TM-1 or equivalent digital meter measures spoke tension in kilogram-force; without it, you're guessing, and guessing with Berd spokes leads to failure.
Tension Measurement and Spoke Preparation
Before lacing, measure and record the tension of a reference spoke from a known good wheel as a baseline. For a typical gravel wheelset with Berd spokes, aim for 70-85 kgf on the non-drive side and 80-100 kgf on the drive side.

Prepare your spokes by laying them out in order and numbering them if it helps. Check each spoke for straightness by sighting down its length against a straight edge; discard any bent spokes.
Inspect the spoke threads, which should be clean and undamaged. Damaged threads prevent the nipple from seating properly and cause uneven spoke tension.
Step-by-Step Installation Sequence
The order you install spokes matters. A chaotic approach leads to crossed spokes, bent spoke heads, and damaged rim holes.
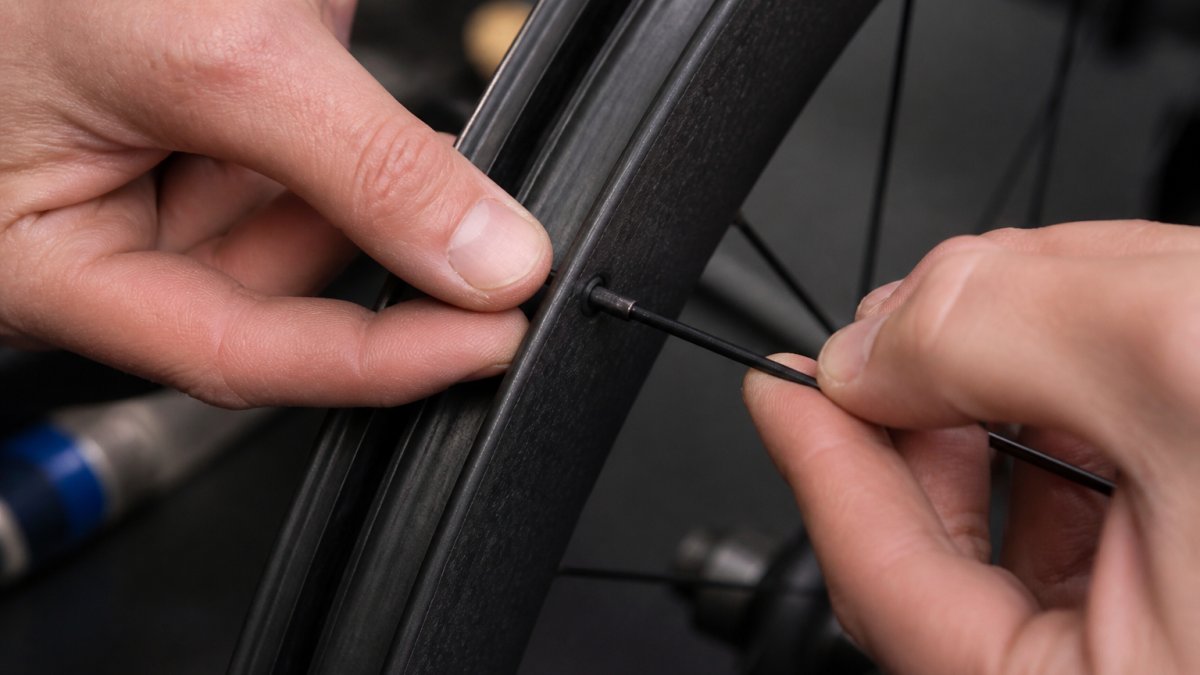
Step 1: Lace the Drive-Side Spokes
Place the rim on the wheel building stand and position the hub so its valve hole aligns with the rim's.
Install the remaining drive-side spokes in sequence, following your lacing pattern.
Check that no spokes are crossed, as crossed spokes create weak points and prevent proper truing.
Step 2: Install Non-Drive-Side Spokes
Flip the wheel and install non-drive-side spokes the same way, leaving all nipples hand-tight and tensioning nothing yet.
Ensure that non-drive-side spokes pass under the drive-side spokes where they cross (if your lacing pattern calls for crosses). This keeps the wheel structurally sound.
Step 3: Seat All Nipples Evenly
Before tensioning, seat all nipples evenly. Use a spoke wrench to turn each nipple down 2-3 full turns, working around the wheel in sequence rather than jumping around, which ensures even pressure on the rim and prevents spoke holes from being stressed unevenly.
After this initial seating, the wheel should have noticeable tension but still be quite loose. You should be able to squeeze adjacent spokes together with your hand.
Berd Spokes Tensioning and Wheel Truing
This is where most builders make critical mistakes. Tensioning Berd spokes on carbon rims is not a one-day job.
Multi-Day Tensioning Process
Berd spokes settle differently than steel.
Berd Spoked Asymmetric 46 Gravel Wheelset 1260g →
Day 1: Increase tension gradually. Use your tension meter. Aim for 40-50 kgf on all spokes.
Day 2: Increase to 60-70 kgf. Check for lateral and radial run-out (wobble and hop).
Day 3: Increase to target tension. For drive-side spokes, aim for 85-100 kgf.
Day 4-5: Leave the wheel alone. The spokes continue to settle. Check tension on day 5.
Achieving Tension Balance on Asymmetric Rims
Asymmetric carbon rims are designed to reduce spoke tension imbalance, but the drive side will always have higher tension than the non-drive side.
Measure tension on both sides regularly.
The goal is not perfect balance, which is impossible on a disc wheel, but stable, predictable tension that won't change after the first ride.
Truing and Final Verification
Once tension is stable, true the wheel.
For a performance wheel, aim for:
- Lateral run-out: ±0.5 mm
- Radial run-out: ±0.5 mm
Adjust spokes in small increments. Tighten spokes on the side that wobbles outward. Loosen spokes on the opposite side. Make quarter-turn adjustments and recheck.
After truing, spin the wheel and listen for a smooth, even sound. Clicks or pops indicate loose spokes or rim damage.
Common Installation Mistakes and Troubleshooting
Overstretching and Spoke Failure
The most common mistake: tensioning Berd spokes too quickly or too high. Builders accustomed to steel spokes often push Berd to 110-120 kgf.
If a spoke snaps during tensioning, stop immediately and identify which spoke failed and why: over-tensioning, a cross-threaded nipple, or pre-existing damage.
Replace the broken spoke with a new one. You cannot re-use a Berd spoke that has failed; the material is compromised.
Nipple Seating Issues on Carbon Rims
Carbon rims have less tolerance for cross-threading than aluminium. If a nipple binds, stop and do not force it; remove the nipple and inspect the rim hole. If the hole is cracked, the rim is compromised and may need replacement.
Always hand-seat nipples before using a wrench, which prevents cross-threading and gives tactile feedback on whether the nipple is seating properly.
Spoke Twist and Lateral Imbalance
If spokes twist during installation, they were likely over-tensioned too quickly. Twisting indicates the spoke is rotating under load. This creates weak points.
If you notice twisted spokes, reduce tension on them by 10-15 kgf and let them settle overnight. The twist often resolves itself; if it doesn't, replace the spoke.
Berd Spokes Maintenance and Long-Term Care
A properly built wheel with Berd spokes requires minimal maintenance compared to steel spoke wheels.
Routine Inspection and Tension Checks
Check spoke tension every 500-1000 kilometres. Use your tension meter. Berd spokes settle less over time than steel, but they do settle slightly.
Inspect the rim for cracks or delamination, as carbon rims can fail suddenly if damaged. White stress lines radiating from spoke holes indicate rim failure is beginning.
Listen for spoke rattle. If spokes sound loose, they likely are. Tighten them slightly and recheck.
Cleaning and Protecting Carbon Rims
Clean your wheels with mild soap and warm water. Avoid high-pressure washers; the force can damage the rim or dislodge spokes.
Dry the wheels thoroughly, as moisture can seep into spoke holes and corrode the nipple threads, even though Berd spokes themselves are corrosion-proof.
For tubeless setups, check the sealant regularly. Dried sealant can unbalance the wheel. Refresh sealant every six months.
When to Seek Professional Help
Building a wheel with Berd spokes on a carbon rim is possible for experienced builders. But there are moments when professional help is worth the cost.
Seek a professional builder if:
- You're unsure about rim or hub compatibility
- Your rim shows signs of damage or delamination
- Spoke tension is erratic or won't stabilise after five days
- You've had a spoke failure and need to diagnose why
- Your wheel wobbles significantly after truing and you can't identify the cause
STOXbyHand offers hand-built wheelsets with Berd spokes, including our Berd Spoked Asymmetric 46 Gravel Wheelset at $2,950.
The process of installing Berd spokes on carbon rims demands patience, precision, and respect for material limits. Rush it, and you'll damage expensive components.
According to Berd's official spoke specifications, polymer spokes deliver superior vibration damping compared to traditional materials, making them ideal for endurance and gravel riding where comfort matters as much as speed. The UCI regulations on wheel specifications define allowable rim profiles and spoke configurations for competitive events, so verify compliance if you're building for racing. For carbon rim maintenance and safety, consult carbon fibre care guidelines from leading rim manufacturers to understand how to protect your investment long-term.
Frequently Asked Questions
Can Berd spokes be installed on any carbon rim?
No, Berd spokes require carbon rims with hook-flanged spoke holes and Berd-approved hubs. Your rim must have sufficient internal width (typically 24-32 mm) to accommodate the spoke nipples. Asymmetric carbon rims are ideal because they balance spoke tension between drive and non-drive sides, which is critical since Berd spokes have a maximum tension of 100 kgf, lower than steel. Always verify your rim's compatibility with the Berd spoke supplier before purchasing.
What is the correct tension for Berd spokes on a carbon rim?
Berd spokes must not exceed 100 kgf of tension, significantly lower than steel spokes at 120 kgf. On asymmetric carbon rims, aim for 70 kgf on the non-drive side and slightly higher on the drive side, but never exceeding 100 kgf. Use a tension meter to measure and verify each spoke. Tension should be equalised across all spokes to prevent rim distortion and premature spoke failure. Multi-day tensioning, spreading adjustments over several days, allows the rim and spokes to settle gradually.
Do Berd spokes require special tools to install?
Yes. You'll need a spoke tension meter (essential for measuring kgf accurately), a nipple driver or spoke wrench, a truing stand, and a wheel dishing tool. A spoke prep tool or light lubricant helps spokes seat smoothly in the nipples. Unlike steel spokes, Berd polymer spokes are sensitive to over-tensioning, so a tension meter is non-negotiable. STOXbyHand recommends professional-grade tools to ensure precision and prevent damage to the spokes or carbon rim.
How often should Berd spokes be serviced or re-tensioned?
Check tension every 3-6 months during the first year, then annually thereafter. Berd spokes settle more gradually than steel, so early rides may require minor re-tensioning. Inspect for spoke twist, rim damage, or nipple movement before each major ride. Unlike steel spokes, Berd polymer is impervious to corrosion, so maintenance focuses on tension balance and rim integrity. If you notice any spoke cracking or nipple seating issues, stop riding and have the wheel professionally inspected immediately.