

Last Updated: October 27, 2026
Quick Summary
To replace road bike spokes, remove the wheel, match the broken spoke's length, gauge and lacing pattern, thread the new spoke through the hub, and true the wheel in small quarter turns. Buy two spokes, not one, and aim for less than 0.5mm of lateral movement at the rim.
- A broken spoke usually snaps at the elbow or nipple, and a bent spoke should be replaced rather than straightened.
- A spoke wrench commonly comes in 3.2mm or 3.4mm sizes for your nipples.
- A spoke length calculator needs hub flange diameter, hub centre to flange distance, rim effective diameter, and hole count with lacing pattern.
- If a calculator returns 291.4mm, order 292mm because a fraction long is recoverable and a fraction short is not.
- Hand the wheel to a builder if three or more spokes are broken or the rim shows cracking around nipples.
Table of Contents
- Spotting a Broken, Bent or Loose Road Bike Spoke
- Bike Spoke Replacement Tools and Parts to Have Ready
- Removing the Wheel and Clearing the Drivetrain
- How to Measure Bike Spoke Length Before You Buy
- Threading the Replacement Spoke Through the Hub
- Replace a Spoke Without Removing Rim Tape
- How to True a Bike Wheel After Spoke Replacement
- When to Hand the Wheel to a Wheel Builder
- Frequently Asked Questions
Spotting a Broken, Bent or Loose Road Bike Spoke
A broken spoke rarely announces itself politely. You feel a soft wobble through the bars, hear a faint tick against the brake pads, or notice the rear wheel drifting sideways through fast corners. Learning how to replace road bike spokes starts with reading those signals correctly.
Quick Diagnosis Before You Touch the Wheel
Spin the wheel slowly and watch the gap between rim and brake pad. A single spot that swings out means a bent or broken spoke on that side. Squeeze pairs of spokes between thumb and finger: a loose spoke feels dead and slack next to its neighbours.
- Broken: the spoke has snapped, usually at the elbow or nipple. Replace it.
- Bent: still attached but kinked. Replace it, don't straighten it.
- Loose: no tension. Tighten it, then check the whole wheel.
Park Tool's wheel and spoke repair guidance is a useful reference if you want a second opinion on what you're seeing.
Bike Spoke Replacement Tools and Parts to Have Ready
Road bike spokes replacement tools are cheap and few. You do not need a full workshop to do this job well.
- Spoke wrench in the correct size for your nipples (commonly 3.2mm or 3.4mm)
- Replacement spoke of the right length and gauge
- Spoke nipple to match
- Tyre levers and a pump
- Cassette removal tool and chain whip if the broken spoke sits on the drive side
- Nipple driver or screwdriver for deep-section rims
- Truing stand (a frame and zip ties work in a pinch)
- Rim tape if you damage the old tape on removal
Buy two spokes, not one. The second costs little and saves a trip when you bend the first during threading.
Removing the Wheel and Clearing the Drivetrain
Wheel removal is simple, but the drivetrain is where most home mechanics lose time. Open the quick-release or undo the thru-axle, release the brake, and lift the wheel clear. Then lay the bike on its non-drive side so you don't bend the derailleur hanger.
Cassette and Disc Rotor Access
A broken drive-side spoke often sits behind the cassette. You have two options:
- Shortcut: thread the new spoke in without removing the cassette, using a slight bend and patience.
- Clean route: remove the cassette with a chain whip and lockring tool, fit the spoke, then refit.
Leave the disc rotor alone unless the spoke is on that side of the hub. Rotors bend easily and a warped rotor is a new problem you don't need.
How to Measure Bike Spoke Length Before You Buy
Spoke length is the one number you cannot guess. Too long and the spoke bottoms out before tension arrives, leaving the nipple proud of the rim bed. Too short and the threads never engage enough of the nipple to hold tension. Either way you get a wheel that will not true and will fail again.
The Four Measurements You Need
A spoke length calculator needs four inputs. Take them from the actual wheel, not from a spec sheet, because rim and hub revisions change dimensions quietly.
- Hub flange diameter, the distance across the flange, centre of hole to centre of hole, on the side the spoke enters. Measure with callipers; do not assume it matches the opposite flange.
- Hub centre to flange distance, the offset from the hub's centreline to the flange face. This differs between drive and non-drive sides on almost every rear road hub, which is why the two sides use different spoke lengths.
- Rim effective diameter, the diameter to the inside of the rim bed where the nipple seats, not the outer rim diameter. For deep-section rims, measure to the nipple seat, not the tyre bead.
- Spoke hole count and lacing pattern, 20, 24, 28 or 32 holes, and whether the wheel is radial, two-cross or three-cross. The pattern changes the effective length because crossing spokes take a longer path.
Feed those four numbers into a spoke length calculator. Most builders round to the nearest available millimetre; if the calculator returns 291.4mm, order 292mm rather than 291mm, because a fraction long is recoverable and a fraction short is not.
Road-Bike-Specific Selection
Length is only half the spec. Match these too:
- Gauge: most road wheels use 2.0/1.8mm double-butted stainless. Heavier riders and disc-brake wheels often run 2.0/1.6mm or plain-gauge 2.0mm on the drive side. Do not mix gauges on the same side of a wheel.
- Head type: J-bend (the classic bent elbow) or straight-pull. They are not interchangeable. Straight-pull spokes need the correct hub-specific head and often a proprietary tool.
- Material: stainless steel is standard. If the wheel runs alloy or carbon spokes, match the original exactly, mixing materials changes how tension is shared and can overload the stiffer spokes.
If you cannot identify the original spec, take the broken spoke to a shop and have it measured, or order the exact replacement from the wheel's manufacturer using the model and year. Guessing from a photo is how home mechanics end up with a drawer full of spokes that almost fit.
A spoke length calculator needs four measurements taken from the actual wheel.
| Measurement | What to measure | Note |
|---|---|---|
| Hub flange diameter | Centre of hole to centre of hole, on the spoke's side | Measure with callipers; do not assume it matches the opposite flange |
| Hub centre to flange distance | Offset from hub centreline to flange face | Differs between drive and non-drive sides on almost every rear road hub |
| Rim effective diameter | Diameter to the inside of the rim bed where the nipple seats | Not the outer rim diameter |
| Spoke hole count and lacing pattern | 20, 24, 28 or 32 holes; radial, two-cross or three-cross | Crossing spokes take a longer path |
Threading the Replacement Spoke Through the Hub
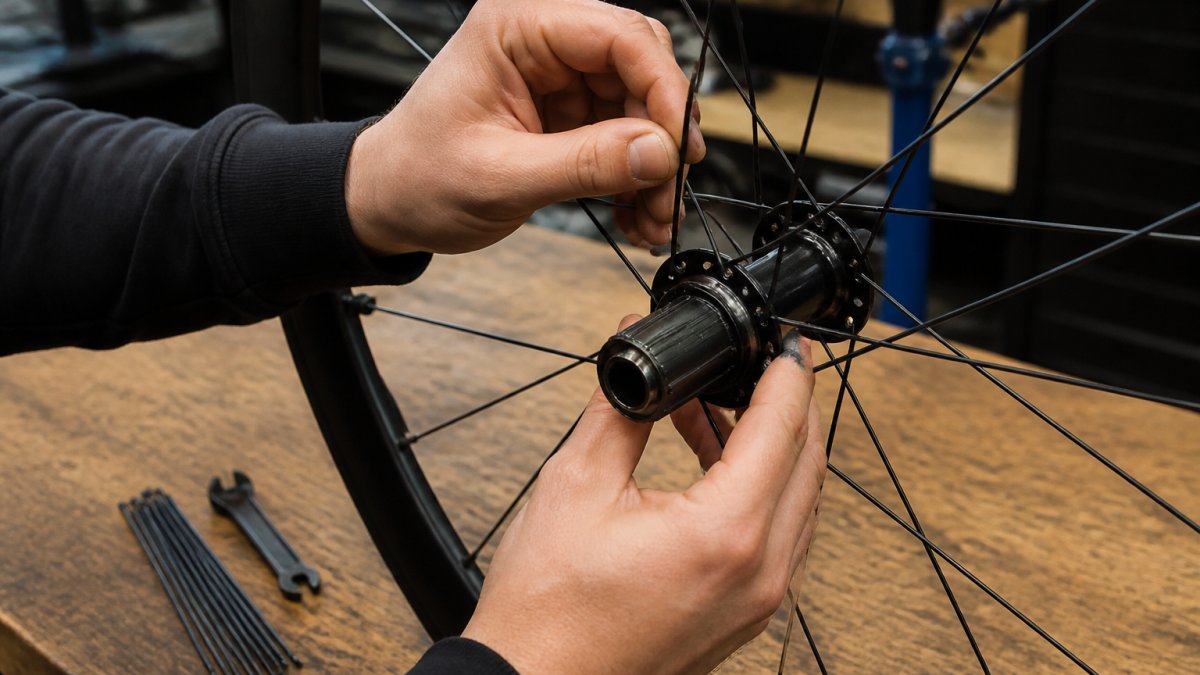
Threading is the fiddly part. Push the spoke through the hub flange from the correct side, then route it to the rim following the existing pattern. For non-steel spokes, see how to install Berd spokes on carbon rims.
Correct Lacing Pattern and Spoke Routing
Match the old spoke exactly. Most road wheels use a three-cross pattern on the rear and two-cross or radial on the front. Look at the neighbouring spokes: does your new spoke cross two or three others before reaching the rim? Copy that.
- Leading spokes angle forward from the hub; trailing spokes angle back.
- Route the new spoke through the same hub flange hole direction as its neighbours.
- Cross over and under the same spokes the old one did.
Get this wrong and the wheel will tension unevenly, which is a fast route to another failure.
Replace a Spoke Without Removing Rim Tape
You can replace a spoke without removing rim tape in most cases.
Watch out: forcing a nipple through tubeless tape almost always breaks the seal, and you'll be chasing a slow leak for weeks. If the tape lifts, replace that section properly rather than patching it.
For tubeless wheels, check the valve hole area too. Disturbing it during the job is a common cause of mysterious pressure loss.
How to True a Bike Wheel After Spoke Replacement
How to true a bike wheel comes down to small, patient adjustments made in the right order. Fit the wheel in a truing stand or back in the frame with the brake pads as a gauge, spin it, and note where the rim drifts before you touch a nipple.
Work in the Right Order
- Seat the nipple and take up slack. Thread the nipple on by hand until the spoke just starts to pull, then use the spoke wrench. Do not overtighten one spoke to compensate for a wobble elsewhere.
- Correct lateral runout first. Side-to-side wobble is fixed by tightening spokes on the opposite side of the drift and slackening the spokes on the same side. Work in quarter turns and re-spin after every adjustment.
- Then correct radial runout. A hop or flat spot is fixed by tightening pairs of spokes evenly across the affected section, alternating sides so you do not introduce a lateral wobble while chasing the hop.
- Check dish last. The rim should sit centred between the locknuts. A dished wheel will handle poorly and wear brake pads unevenly.
Aim for less than 0.5mm of lateral movement at the rim as a home-mechanic target. To understand why hand-built wheels stay true longer, read the complete guide.
Tension, Lateral Runout and Radial Runout
- Lateral runout is side-to-side wobble. Fix by tightening spokes on the opposite side of the drift.
- Radial runout is a hop or flat spot. Fix by tightening pairs of spokes evenly.
- Spoke tension should feel firm and even when squeezed in pairs. A slack spoke means the wheel will fail again soon.
Squeezing pairs by hand is a rough check, not a measurement. A tension meter gives you a number in kilograms-force and lets you compare the new spoke against its neighbours on the same side. Most practitioners find that even tension matters more than absolute tension: a wheel with one tight spoke and one slack spoke will keep breaking spokes no matter how true it looks.
Post-Repair Safety Checks
Before you ride, run through this checklist:
- Brake clearance: spin the wheel and confirm the rim does not rub the pads through a full revolution. Re-centre the brake if needed.
- Tyre seating: check the bead is seated evenly all the way round, especially if you disturbed the tyre or rim tape. Inflate to the pressure on the sidewall and inspect the bead line.
- Wheel security: confirm the quick-release or thru-axle is fully closed and the wheel is seated in the dropouts.
When to Hand the Wheel to a Wheel Builder
Some jobs are worth doing yourself. Others aren't. Hand the wheel over if:
- Three or more spokes are broken or the rim shows cracking around nipples
- The hub flange has torn or cracked
- Tension feels wildly uneven across the whole wheel
Repeated spoke failures usually point to a deeper cause: uneven tension, a tired rim, or a wheel built below spec. If you'd rather buy a replacement, browse our hand-built road disc wheels. Replacing spokes one at a time on a failing wheel just delays the next breakdown.
Frequently Asked Questions
Can you replace a broken spoke without removing the tyre?
On most road wheels you can replace a spoke with the tyre and tube still fitted, provided the nipple is accessible from the rim bed. You will need to lift the rim tape slightly at that one spot to reach the nipple, then reseat it. Tubeless setups are different: breaking the bead and removing sealant is usually necessary, and you should plan to re-tape or at least reseat the tape before refitting.
How do you find the correct replacement spoke length?
Measure the old spoke from the bend to the end of the threads, or use a spoke length calculator with your hub flange diameter, flange spacing, rim effective diameter and spoke count. Road bike spokes typically run 250-310mm depending on lacing pattern and rim depth. Buy the same gauge and material as the rest of the wheel, and match the lacing side (leading or trailing) so tension stays even.
Do you need to true a wheel after replacing a spoke?
Yes. A new spoke changes the tension balance across the wheel, so lateral and radial runout will almost always need correcting. Fit the wheel in a truing stand, bring the new spoke up to match its neighbours, then adjust quarter-turn at a time until the rim runs straight within about 0.5mm. Skipping this step is the most common reason a replaced spoke fails again within weeks.
Can you ride a road bike with one broken spoke?
Only to get home, and only slowly. A broken spoke drops tension on neighbouring spokes, which pulls the rim out of line and can rub the brake or frame. On a rear wheel the rim may contact the chainstay. Release the brake quick-release or open the caliper, ride gently without sprinting or cornering hard, and replace the spoke before your next proper ride.
Spoke replacement is a skill worth having, but a wheel that keeps eating spokes is telling you something. STOXbyHand has spent over 12 years building carbon wheelsets with spoke options including carbon fiber, Berd and TiFi polymer, each one hand built and tensioned to order. Get started with STOXbyHand and ride a wheel built to stay true.
