

Last Updated: October 31, 2026
Quick Summary
Optimizing gravel bike aerodynamics for racing means reducing drag across the whole system: rider position, cockpit, frame, wheels and tyres. Start with the rider, since your body creates most of the drag, then add aero bars, match rim width to tyre width, and test each change one at a time.
- Move your hands to the drops to lower your chest and shoulders and cut frontal area.
- Set aero bar pads so your forearms sit level with your back and keep extensions short.
- Keep the tyre no wider than the rim's outer edge so air flows smoothly.
- On rough gravel, a wider tyre at lower pressure often beats a narrow tyre despite more drag.
- Rank upgrades by cost: position and aero bars first, wheels third, frame last.
Table of Contents
- Why Gravel Bike Aerodynamics Still Matter at Lower Speeds
- Step 1: Dial In Your Aero Position for Gravel Racing
- Step 2: Set Up Gravel Bike Aero Bars That Actually Work
- Step 3: Choose Aerodynamic Gravel Wheels by Depth and Width
- Step 4: Understand Gravel Tyre Rolling Resistance and Aerodynamics
- Step 5: Test Your Changes and Measure the Gains
- Step 6: Prioritise Upgrades by Cost, Weight and Expected Benefit
- Step 7: Balance Aero Gains With Stability on Rough Gravel
- What to Do Next
- Frequently Asked Questions
Why Gravel Bike Aerodynamics Still Matter at Lower Speeds
Most riders assume aerodynamics only matters above 35 km/h, and that assumption costs them time in every gravel race.
A headwind on an exposed road can raise your effective air speed, so you pay an aero penalty at a speed you never planned for.
Most guides treat gravel aero as a wheel-only problem. It isn't. It's a system of rider position, cockpit, frame, wheels and tyres.
Union Cycliste Internationale technical regulations for equipment
Step 1: Dial In Your Aero Position for Gravel Racing
The biggest aero gain on any bike is the rider, not the equipment. Your body accounts for most of the drag you produce, so changing how you sit changes the whole equation.
An aero position for gravel racing means getting your chest and shoulders lower and narrower without wrecking your control on loose surfaces. It is not a road time trial tuck; gravel demands that you stay ready to react.
Lowering Your Chest and Shoulders Without Losing Control
Start with your hands, not your stem. Moving your hands from the hoods to the drops drops your chest and shoulders and cuts your frontal area.
Then look at your stem. Removing spacers or fitting a slightly longer, lower stem brings your chest down. Do it in small steps.
A common mistake is chasing a low position at the cost of line choice.
Step 2: Set Up Gravel Bike Aero Bars That Actually Work
Gravel bike aero bars are the single biggest bolt-on aero gain available to most racers. They let you tuck your chest and shoulders low and narrow, and take the weight off your hands on long exposed sections.
But most riders set them up wrong. Here's how to get them right:
- Set the pad height so your forearms sit level with your back. A flat back is a fast back.
- Narrow the pads. Bring your elbows in until your arms shield your chest.
- Keep the extensions short. You need to steer and see the trail, not stretch out like a time triallist.
Watch out: aero bars on rough gravel are a handling risk. You cannot brake or steer quickly from the pads. Use them only on smooth, straight, exposed sections where you can see far ahead.
Step 3: Choose Aerodynamic Gravel Wheels by Depth and Width
Aerodynamic gravel wheels are where the equipment gains get real. Depth and width work together. A deeper rim slices through the air better.
The trade-off is weight and crosswind handling: deeper rims are generally heavier and catch side winds, and gravel demands clearance and strength. That's why the right depth for gravel is usually shallower than for road.
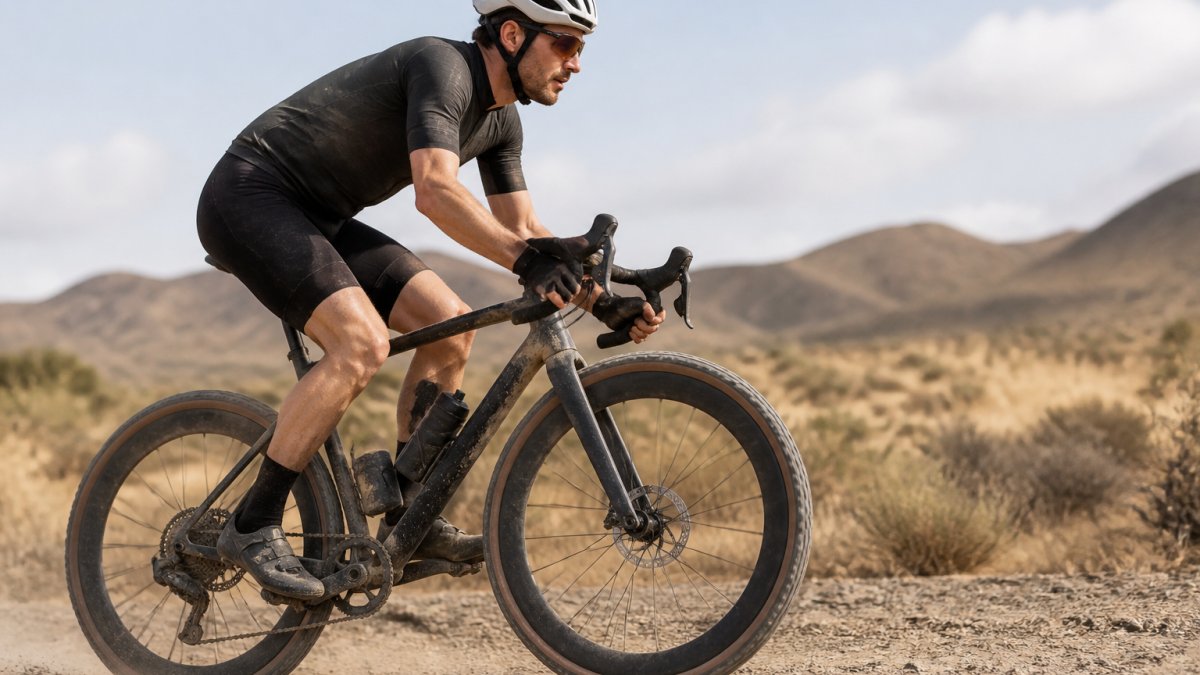
If you want the underlying physics first, our guide on what makes carbon wheels aerodynamic explains how rim shape and airflow interact. And if you're still deciding between wheel types, the breakdown of road vs gravel bike wheels covers the key differences before you commit.
Matching Rim Width to Tyre Width for Smoother Airflow
A general rule is that the tyre should be no wider than the rim's outer edge. When the tyre bulges past the rim, air trips over the edge and creates turbulence; when it sits flush or slightly narrower, air flows smoothly from tyre to rim.
The 50 FWT Wide RG uses a 36.5 mm wide rim with a 25 mm internal width, and its listing gives a tyre range of 34 mm to 55 mm. It is built for road or gravel use.

Step 4: Understand Gravel Tyre Rolling Resistance and Aerodynamics
Gravel tyre rolling resistance and aerodynamics pull in opposite directions, and finding the balance is the whole game. A wider tyre has lower rolling resistance on rough surfaces and more comfort, but also more frontal area and more drag. Match the tyre to the course rather than picking one extreme.
Why Wider Tyres Can Be Faster on Gravel
On rough surfaces, a wider tyre at lower pressure deforms around small obstacles instead of bouncing over them, reducing energy lost to vibration and suspension losses in the rider's body. On coarse gravel, a wider tyre at appropriate pressure often has lower total resistance than a narrow tyre at high pressure, even with higher aerodynamic drag. The rougher the course and the lower the speed, the more the rolling resistance advantage outweighs the aero penalty.
45 FWT Wide Carbon Spoked GWR (1160 grams) →
The Aerodynamic Penalty of Width and Tread
A wider tyre increases frontal area and, if it bulges past the rim edge, creates turbulence at the tyre-rim junction. Knobby tread adds drag and, on hardpack, increases rolling resistance because the knobs deform and scrub. For a fast race on smooth gravel, a smoother tread in a moderate width usually wins. Balancing these mechanical trade-offs requires a nuanced approach to choosing gear for terrain that accounts for the specific demands of the course ahead.
| Tyre choice | Rolling resistance | Aerodynamic drag | Best for |
|---|---|---|---|
| Narrow, smooth (34-35 mm) | Higher on rough, lower on smooth | Lower | Fast, smooth gravel courses |
| Wide, smooth (40-45 mm) | Lower on rough | Higher | Mixed and rough courses |
| Wide, knobby | Lowest on loose | Highest | Technical, loose terrain |
Setting Pressure for the Surface, Not the Sidewall
Set your tyre pressure for the surface, not the number on the sidewall. Lower pressure on rough gravel reduces vibration and rolling resistance, but too low risks pinch flats, sluggish handling and rim damage. Start with a pressure calculator or the manufacturer's guidance for your system weight and tyre width, then adjust down in small increments on the actual course surface, testing on the roughest section you'll race.
A Simple Tyre Test You Can Run
You can compare tyre options without a wind tunnel. Pick a representative gravel segment with consistent surface, run each tyre set at least three times at the same steady power and heart rate, record time and average speed, and log wind and temperature. Change only the tyre (or only the pressure) between runs, and test on the surface that matters most for your race.
Step 5: Test Your Changes and Measure the Gains
You cannot optimize what you don't measure. A change that feels faster isn't always faster, and most riders either skip testing or test so loosely the results are noise. Here's a repeatable field-testing protocol you can run without a wind tunnel.
The Controlled Field Test Protocol
- Pick a flat, sheltered out-and-back segment with consistent surface and low traffic. An out-and-back cancels elevation gain and lets you compare runs in both directions to average out wind.
- Hold a steady power and heart rate on each run, using the same cadence and effort target every time. If you have a power meter, aim for a repeatable power, not your maximum.
- Record your time and average speed for the segment, plus power, heart rate, wind speed and direction, temperature and tyre pressure.
- Change one thing only, then repeat the run. If you swap wheels and tyres together, you won't know which one helped.
- Run each setup at least three times and average the results. A single run is an anecdote, not a result.
- Log every change and its result in a simple spreadsheet or notebook. Over a few sessions, the pattern becomes clear.
Accounting for Wind, Terrain and Surface
Field testing on gravel is messier than on tarmac. Wind changes, surface varies and traffic interferes. Three practical controls help:
- Test early in the morning when wind is usually lightest and most consistent.
- Use an out-and-back so a headwind on the way out becomes a tailwind on the way back, and average the two runs.
- Test on the surface you'll race on. A position that tests fast on smooth hardpack may be slower on loose gravel because you can't hold it.
If you have a power meter, compare speed at the same power rather than time alone. If you don't, use heart rate and perceived effort as a rough control, and accept noisier results.
What the Numbers Mean
A meaningful gain repeats across runs and is larger than the run-to-run variation. If your runs vary by 1 km/h and a change gives 0.5 km/h, you haven't proven anything. If a change gives 1.5 km/h consistently in both directions, you have a real signal. Be sceptical of single-run improvements and of changes that only feel faster.
Why Testing Beats Copying
Testing is where the real gains come from. A rider who tests will beat a rider who copies a setup from someone else's bike, because the fastest setup depends on your body, your course and your handling limits.
Union Cycliste Internationale technical regulations for equipment
Step 6: Prioritise Upgrades by Cost, Weight and Expected Benefit
Not every aero upgrade is worth the money. Spend where the gain is biggest relative to cost and weight. Here's how we'd rank the priorities for most gravel racers:
- First: rider position and aero bars. Lowest cost, biggest gain.
- Second: aero clothing. Tight-fitting kit reduces body drag cheaply.
- Third: wheels. A real gain, but the biggest spend. Go here once the free changes are done.
For racing-specific wheel options, our shortlist of custom gravel wheelsets for racing lets you weigh cost against expected aero benefit before you commit.
Step 7: Balance Aero Gains With Stability on Rough Gravel
The fastest setup is the one you can hold at speed without losing control, a line most aero advice ignores.
Stability comes from three things: rim depth matched to conditions, tyre width matched to the surface, and a position you can hold confidently. On rough gravel, a slightly shallower, wider rim often beats a deeper one because it stays planted.
For riders who want comfort and speed together, the TiFi polymer spokes are designed to reduce vibration compared to steel and carbon spokes.
What to Do Next
The fastest gravel racers don't buy speed. They build it, one measured change at a time, starting with position and finishing with wheels that match their course and riding style.
That's where we can help. Our wheels are hand-built to 0.1 mm trueness, with a 3-year warranty on manufacturing defects and crash replacement at 60% of RRP.
Get started with STOXbyHand and turn your aero gains into race results.
Frequently Asked Questions
How can I make my gravel bike more aerodynamic without buying a new bike?
Start with the rider, not the frame. Lower your chest and shoulders by dropping stem stack height, narrow your bar width, and add clip-on aero bars if the course allows them. Then look at wheels and tyres: a wide rim matched to a 34-35mm tyre keeps airflow smooth over the rim edge. Tyre pressure and tread choice affect rolling resistance as much as drag. These changes typically cost far less than a new frame.
Does an aero position make a difference in gravel racing?
Yes, though the gain is smaller than on tarmac because gravel speeds are lower. Drag rises with the square of speed, so at 25-30 km/h the rider still accounts for most of the resistance. A lower, narrower position reduces frontal area and cuts drag noticeably over a long race. The limit is control: on loose or technical sections you need to sit up, so treat the aero position as something you hold on fast, straight, smooth stretches rather than everywhere.
Are deep-section aerodynamic gravel wheels worth it for racing?
Deeper rims reduce drag, and on gravel the wider rim bed matters more than raw depth. A rim around 45mm deep with a 25mm internal width lets a 34-35mm tyre sit slightly narrower than the rim edge, which smooths airflow. Weight and crosswind handling still count, so pick depth for your course. The STOXbyHand 45 FWT Wide Carbon Spoked GWR is priced at $2,600, weighs 1160g and is built to 0.1mm trueness.
How do I balance aerodynamics, comfort and control on rough gravel?
Set a priority order for each course. On smooth, fast gravel, push position and wheel depth. On chunky or technical terrain, favour wider tyres at lower pressure and a position you can hold safely. A wheel like the TiFi Polymer Spoked Gravel 45 at $2,990 uses spokes with 52% more elasticity than steel, which the listing says reduces vibration. Test any change on the terrain you will race before committing to it.
